REVIEW · KYOTO
Single- & multi-day Adventures within Kyoto Nara Osaka Kobe
Book on Viator →Operated by Kyosako Private Tours Japan · Bookable on Viator
One car can connect four cities fast. This private Kyoto Nara Osaka Kobe adventure lets you string famous sights together with flexible routing and Wi‑Fi on board, without the stress of coordinating trains for every hop.
I like two things most: you get a private vehicle for just your group (up to 8), and the driver can adjust the day to your pace. Add hotel/airport pickup and drop-off, plus 100V power outlets for charging devices, and the whole trip feels built for real travel days, not just sightseeing.
One consideration: admission fees are not included, so some stops will cost extra, and the itinerary is busy enough that you’ll want to plan for walking time. Also, there’s no restroom on board, so breaks matter.
In This Review
- Key highlights you’ll actually feel
- A private Kyoto–Nara–Osaka–Kobe plan that saves your feet and your time
- Price and value: $385 per group can be a bargain
- What’s included in the vehicle (and why you’ll care on day 2)
- Day 1 in Kyoto: from Amanohashidate and Ine to Arashiyama and Gion
- Amanohashidate: pine pines and a classic sandbar view
- Ine no Funaya: boathouses and the Urashima Taro connection
- Arashiyama: the famous western Kyoto district
- Kinkaku-ji and Nijo Castle: Zen pond elegance plus shogun politics
- Kyoto Imperial Palace, Nishiki Market, and the eastern temple trio
- Sanjusangendo and Fushimi Inari: statues and the torii maze
- Ending with the Hozugawa River and Kyotango beach time
- Day 2 Osaka: castles, markets, alley charm, and neon without the scramble
- Osaka Castle and the high-energy museum stop
- Minoo Park and temple pause time
- Shinsekai, Kuromon Market, and the food-and-photo triangle
- Hozenji Yokocho and Dotonbori: old alley mood meets neon theater
- Shopping finish: Shinsaibashi-suji and a shrine quiet moment
- Tempozan Harbor Village, Hoshi no Buranko, and Asahi Beer Museum
- Day 3 Nara Park, Todai-ji, Isuien Garden, and Uji tea time
- Nara Park and Todai-ji: the deer-and-Buddha combo
- Higashimuki shopping street and Kofuku-ji pagoda views
- Isuien Garden: a calmer pause with included admission
- Kasuga Grand Shrine and lantern approaches
- Naramachi and Uji: old town lanes then tea-country quiet
- Day 4 Kobe and beyond: Rokko views, sake areas, earthquake memory, and Himeji Castle
- Mt. Rokko and garden viewpoints: Osaka Bay views without a plane ticket
- Nada no Hitotsubi and Shushinkan Brewery: sake stop for people who like details
- Kobe Earthquake Memorial Park: important and direct
- Kitano Ijinkan-gai, Chinatown, and Harborland: foreign settlement to food scenes
- Himeji Castle and Koko-en: the big-ticket finale
- Arima Onsen: a simple footbath-style unwind
- Tickets, walking, and other practical realities
- Who should book this private Kyoto Nara Osaka Kobe tour
- Should you book Kyosako Private Tours Japan?
- FAQ
- How many people is this private tour for?
- How much does the tour cost?
- How long is the experience?
- Does the tour include pickup and drop-off?
- Is Wi-Fi available during the trip?
- Are admission fees included?
- Does the vehicle have power outlets for charging devices?
- Is there a restroom on board?
- Does the tour use mobile tickets?
- What is the cancellation policy?
Key highlights you’ll actually feel
- Private car for up to 8: easier family and small-group travel than shared buses
- Wi‑Fi plus charging power: keep maps, messages, and photos running
- Pickup and drop-off where you want: reduces time lost to station transfers
- 1 to 4 days across Kyoto, Nara, Osaka, Kobe: pick your perfect mix
- Packed classics plus quieter corners: temples, shopping alleys, gardens, and scenic stops
- Team flexibility on the fly: your route can shift based on what you want
A private Kyoto–Nara–Osaka–Kobe plan that saves your feet and your time

Trying to do Kyoto, Nara, Osaka, and Kobe in one trip is doable—but doing it well usually means a lot of switching trains, timing tickets, and walking to stations you didn’t know existed. This kind of private tour changes the rhythm. You’re not stuck with a fixed route between cities.
I especially like that you’re not just buying “transportation.” You’re buying control. You can select a one-day option (pickup in one city and drop-off in another), or stretch it to a multi-day loop. Either way, the private car gives you fewer bottlenecks and more freedom to spend time where your group cares most.
You can also read our reviews of more tours and experiences in Kyoto.
Price and value: $385 per group can be a bargain
The price is $385 per group (up to 8). That’s worth looking at as a group math problem, not a single-person price tag. If you fill the whole group size, you’re at about $48 per person; even at 4 people, it’s about $96 per person.
Where it gets smart is that you’re paying for a private, air-conditioned vehicle across multiple cities. Shared tours often save money but cost you time: long waits, crowded seats, and “see it fast” pacing. With a private vehicle and pickup/drop-off, you trade a bit of budget for a lot of practical convenience.
Two other value points: Wi‑Fi helps you coordinate dinner and logistics on the move, and 100V power for charging is a quiet lifesaver when you’re using your phone constantly for photos, tickets, and maps.
What’s included in the vehicle (and why you’ll care on day 2)
Your car includes air conditioning, Wi‑Fi access, and 100V AC power supply so you can charge devices like laptops and cameras during excursions. Pickup and drop-off are included at hotels, the airport, and other locations you choose.
There’s no mention of a restroom on board, so you’ll want to use stops strategically. Also, because the tour says admission fees aren’t included, you should treat each major temple, castle, museum, boat ride, and garden as a potential extra cost.
The upside? You get a smooth base for a long itinerary. When you’re hopping between Kyoto’s neighborhoods, Osaka’s markets, and Kobe’s viewpoints, a comfortable car can make the day feel manageable instead of exhausting.
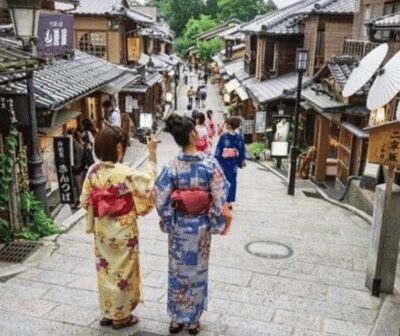
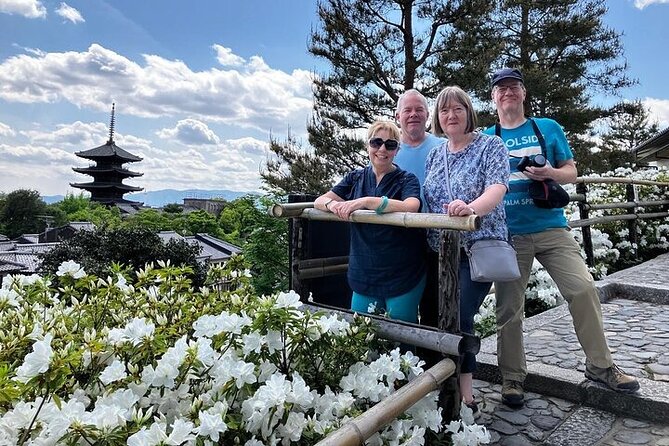
Day 1 in Kyoto: from Amanohashidate and Ine to Arashiyama and Gion
Day 1 is the “Kyoto greatest hits” day—with a twist of northern-coast scenery and seaside village charm. Expect a lot of iconic stops, and plan for a full day because the list is long.
Amanohashidate: pine pines and a classic sandbar view
Amanohashidate is a pine-covered sandbar stretching across Miyazu Bay, famous enough to translate its name as bridge in heaven. The big win here is the setting: you’re looking at a natural landform that feels like a postcard even before you reach any landmarks.
Admission is listed as not included, so treat it as a possible extra.

Ine no Funaya: boathouses and the Urashima Taro connection
Ine no Funaya is a seaside fishing village known for funaya—boathouses lined along the bay. It ties into the Urashima Taro folk tale through the local Urashima shrine, which adds story to the scenery if you like your sightseeing with a cultural thread.
The stop is about an hour, so you’ll want to move at a comfortable walking pace and not rush the views.
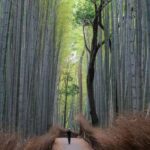
Arashiyama: the famous western Kyoto district
Arashiyama is a well-known Kyoto area with long historical appeal, and it works whether you’re chasing gardens or just people-watching and photos. You’re given about two hours, which usually means you’ll pick a couple of highlights rather than trying to do everything in one go.
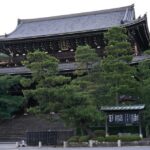
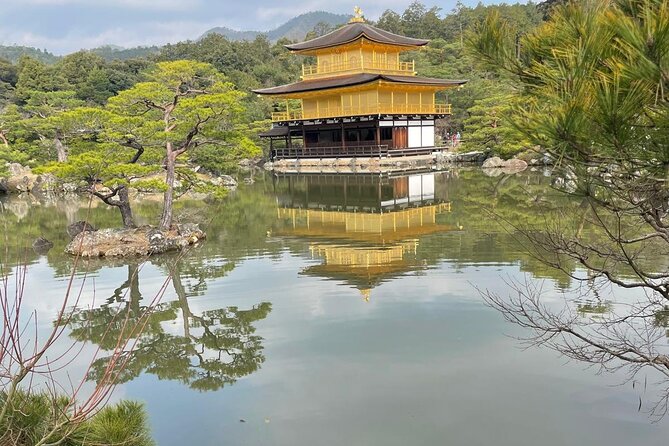
Kinkaku-ji and Nijo Castle: Zen pond elegance plus shogun politics
Kinkakuji Temple (the Golden Pavilion) gets you the signature Zen temple look over a pond. It’s a short stop (about 30 minutes), so focus on angles and details—this is one of those places where the best photos depend on where you stand.
Then you roll into Nijo Castle (about an hour), a former imperial residence and a World Heritage site. This adds contrast: Kinkakuji is visual calm; Nijo Castle is imperial-era power and design.
Kyoto Imperial Palace, Nishiki Market, and the eastern temple trio
You continue to the Kyoto Imperial Palace (about an hour), then Nishiki Market (about 45 minutes), Kyoto kitchen in nickname form. Nishiki is great for quick tasting and browsing, but it’s also where you can lose time if you stop for every snack.
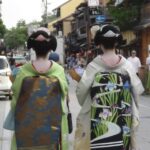
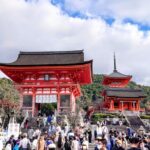
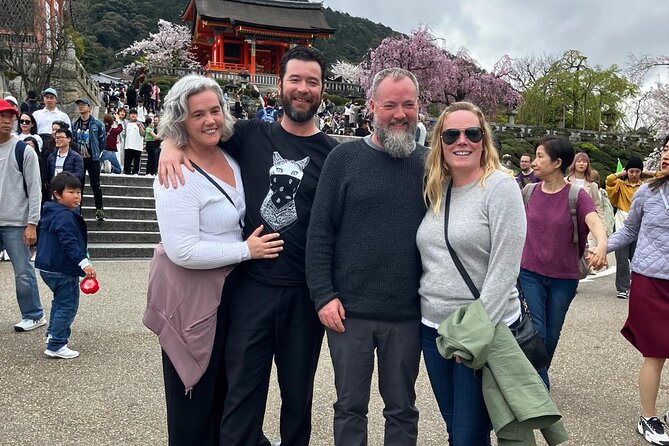
Next you hit Ginkakuji (Silver Pavilion) and Nanzen-ji, plus time through Gion (about two hours). These stops are your pacing balance: temple calm, a classic historic district stroll, and that feeling of Kyoto moving through centuries.
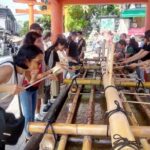
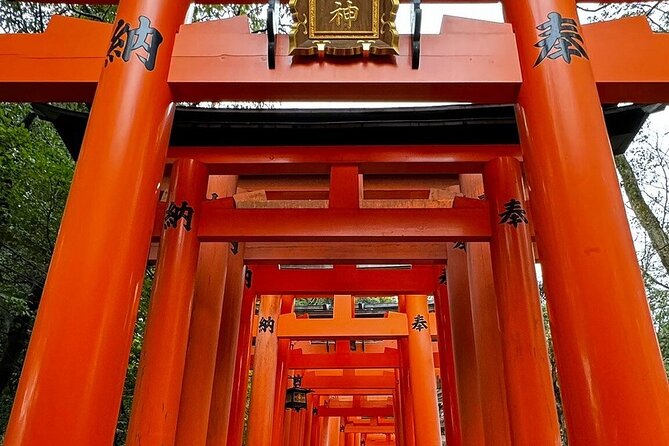
Sanjusangendo and Fushimi Inari: statues and the torii maze
Sanjusangendo’s claim to fame is 1,001 statues of Kannon (the goddess of leniency). It’s a full hour, and the place is known for visual density—so don’t plan to “scan.” You’ll enjoy it more if you slow down and let your eyes adjust.
Fushimi Inari-taisha is shorter on paper (about 30 minutes), but it’s a torii tunnel experience you can’t fully shrink. If your group loves walking, you might want to ask your driver for a little extra time here.
Ending with the Hozugawa River and Kyotango beach time
You finish with the Hozugawa River boat ride endpoint (listed around two hours), then Kyotango with beach scenery (about two hours). The day closes with stops marked free, including a winery visit at Amanohashidate Winery (about two hours).
This is a lot for one day, but it’s also the reason a private car helps. You’re not debating how to connect all these places by transit.
Day 2 Osaka: castles, markets, alley charm, and neon without the scramble

Osaka day feels like a mix of big-ticket sights and food-focused neighborhoods. The tour gives you multiple “easy to love” areas, so you can build your perfect Osaka blend.
Osaka Castle and the high-energy museum stop
You start with Osaka Castle (about an hour). Even if you’re not a deep castle person, the structure is a major Osaka landmark and a good reset after travel days.
Then it’s CUP NOODLES MUSEUM OSAKA IKEDA (about an hour). This is playful and hands-on in a way that often works well for families, and it’s listed as not included admission-wise, so you’ll want to budget for entry.
Minoo Park and temple pause time
Minoo Park is listed as free, and it includes Minoosan Ryuanji Temple. This is your green break from shopping streets and crowds. You get about two hours, which is enough to walk and still enjoy the setting.
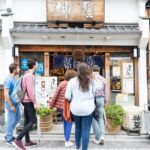
Shinsekai, Kuromon Market, and the food-and-photo triangle
Shinsekai (about an hour) gives retro Osaka vibes. Then you move through Sennichimae Doguyasuji Shopping Street and Kuromon Market, both marked free in the plan, with Kuromon taking about 45 minutes.
Kuromon is one of those markets where you’ll want to pick a few items and commit. Don’t try to taste everything.
Hozenji Yokocho and Dotonbori: old alley mood meets neon theater
Hozenji Yokocho is a narrow alley known for lanterns and cobblestone paths, plus a small temple visit. Dotonbori is the opposite mood: canal-side energy, neon signs, and street food focus.
You get roughly 45 minutes at each. That’s enough for a loop and a snack, but not enough for slow photography if your group is camera-heavy.
Shopping finish: Shinsaibashi-suji and a shrine quiet moment
Shinsaibashi-suji is a covered shopping street and takes about an hour. It’s a good place to buy gifts or just let your group drift.
Then you add Sumiyoshi Taisha (about an hour), a shrine with unique Sumiyoshi-zukuri architecture. That stop adds variety: markets and neon, then a calmer, older faith site.
Tempozan Harbor Village, Hoshi no Buranko, and Asahi Beer Museum
Tempozan Harbor Village is listed as not included admission-wise and takes about two hours. The Hoshi no Buranko bridge viewpoint is marked free with about two hours.
Asahi Beer Museum is about an hour and is not included. If your group likes drink-themed museums, this is a natural fit for pacing after markets.
The day ends with a brief look at Tondabayashi Jinaimachi (listed as about two minutes). That’s more of a quick photo/architecture glance than a major stop, so don’t expect it to replace Osaka food time.
Day 3 Nara Park, Todai-ji, Isuien Garden, and Uji tea time
Nara day has a strong classic sequence, then shifts to gardens and tea territory.
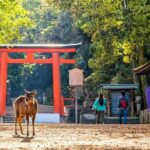
Nara Park and Todai-ji: the deer-and-Buddha combo
Nara Park is free, with roaming deer and big temple area energy. You get about an hour, which is enough to see the general scene and not enough to do slow wandering across all corners.
Todai-ji is about an hour and includes the giant bronze Daibutsu Buddha. Admission is listed as not included here, so plan for extra cost. It’s also where you get a major “wow” scale moment.
Higashimuki shopping street and Kofuku-ji pagoda views
Higashimuki Shopping Street is about 30 minutes, and Kofuku-ji is about an hour. Kofuku-ji adds multiple pagodas and temple complex atmosphere, which balances the Todai-ji grandeur.
Then you walk Sanjodori Street, and the plan lists admission included for that segment. Since the details only say included, just be ready that this part of the day may have a ticketed activity tied to it.
Isuien Garden: a calmer pause with included admission
Isuien Garden is about an hour and is listed as included admission-wise. This matters because gardens often cost more than you expect at the door. A built-in included ticket is a nice value move.
Kasuga Grand Shrine and lantern approaches
Kasuga Grand Shrine takes about an hour, and it’s where the lantern story is a big deal: many donated lanterns plus stone lanterns along approaches. Even with limited time, this is one of those places where the visual theme carries the experience.
Naramachi and Uji: old town lanes then tea-country quiet
Naramachi is listed as included admission-wise (about 30 minutes). It’s classic machiya-era merchant-town feeling with small alleys and shops—great for browsing and a slower pace before the final detour.
Then you head to Uji for about two hours. Uji is known for tea, and the tour frames it as a green, terraced setting for a quieter change of pace. If you want a break from shrine crowds, this is a good place to reset.
Day 4 Kobe and beyond: Rokko views, sake areas, earthquake memory, and Himeji Castle
Day 4 is a wide geographic sweep: Kobe mountain views, sake districts, historical remembrance, foreign settlement areas, then a jump to Himeji for one of Japan’s most famous castles and a garden.
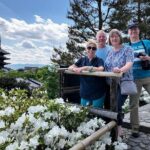
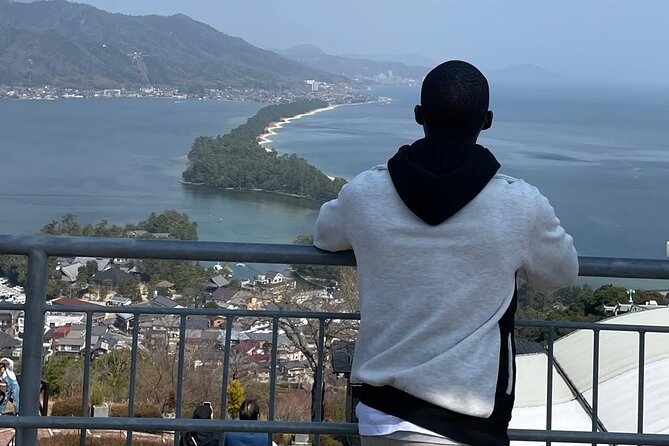
Mt. Rokko and garden viewpoints: Osaka Bay views without a plane ticket
Mount Rokko (Rokkōsan) is free in the plan and takes about two hours. You also visit Kobe Nunobiki Herb Gardens as part of that area.
Rokko Garden Terrace and Rokko-Shidare Observatory add more viewpoint time, with Garden Terrace marked free and Shidare listed as not included admission-wise. If your group likes panoramas, this is where you’ll feel the payoff.
Nada no Hitotsubi and Shushinkan Brewery: sake stop for people who like details
Nada no Hitotsubi is about an hour and is not included admission-wise. You visit sake breweries in the area, and then you go to Kobe Shushinkan Brewery for about an hour.
Shushinkan has a large shop and a restaurant that pairs Japanese cuisine with sake, and it runs free guided tours of the sake warehouse once per day (as stated in the plan). If you’re a sake fan, this is one of the more distinctive parts of the entire itinerary because it’s about the product and the process, not only the setting.
Kobe Earthquake Memorial Park: important and direct
Port of Kobe Earthquake Memorial Park is free and about an hour. The tour highlights the January 17, 1995 earthquake and the human impact. This stop can feel heavy compared with shopping streets, so it’s worth treating it as a meaningful segment rather than a quick checkbox.
Kitano Ijinkan-gai, Chinatown, and Harborland: foreign settlement to food scenes
Kitano Ijinkan-gai is about an hour and not included admission-wise. This is the former foreign merchants and diplomats district after the port opened, so you’ll get architecture contrast compared with Kyoto’s temple buildings.
Then it’s Chinatown (Nankinmachi) for about an hour, followed by Kobe Harborland for about an hour. Both are free in the plan. This is your classic Kobe “mix it up” day: memory and scenery first, then neighborhood variety.
Himeji Castle and Koko-en: the big-ticket finale
Himeji Castle (not included admission-wise) is about an hour and is listed as a UNESCO World Cultural Heritage site. The plan also includes Koko-en garden (about an hour) with admission marked included.
This combo is smart: castle for structure and scale, then Koko-en for garden design and calm walking. If you’re only doing one day outside the cities, this is the kind of stop that makes it feel worth it.
Arima Onsen: a simple footbath-style unwind
Arima Onsen is listed as free and about an hour, with comfort-focused hot spring bathing and footbath noted in the plan. Even if you don’t do a long soak, it’s a good way to end a physically demanding itinerary.
Tickets, walking, and other practical realities

The tour is clear on one thing: admission fees are not included. That means your actual total cost will depend on which ticketed stops you choose and how long you spend at each.
Good news: several stops are listed as free, and a few are marked included (like some garden and street segments). Still, don’t wait until you’re at the gate to realize you’ll need cash or a card that works at that location.
Also plan for walking. Even when the time per stop looks short, places like shrine complexes and temple areas often require more movement than the clock suggests. If you’re with older family members or someone who tires quickly, your best move is to use the flexible routing feature and cut back time at the heaviest legs.
Who should book this private Kyoto Nara Osaka Kobe tour
This tour fits best if you want:
- A private multi-city itinerary without the constant train reshuffling
- A group of up to 8 (families, friends, small tour groups)
- Comfort priorities like air-conditioned transport and Wi‑Fi
- Flexibility to adjust pacing during the day
It may not be the best fit if you want a mostly hands-off day with minimal walking and no ticket planning. This plan is built for people who enjoy seeing a lot, not for people who want long, slow afternoons everywhere.
One more note on quality signals: the overall rating is 4.8 with 94% recommended. That said, one low rating flag mentions a refund dispute when a cancellation was involved, so keep an eye on timing if you think your schedule might change.
Should you book Kyosako Private Tours Japan?
Yes—if your top goal is saving coordination headaches while still hitting the best-known sights across Kyoto, Nara, Osaka, and Kobe. The private car setup, pickup/drop-off, and Wi‑Fi/charging power are the kind of practical perks that make a multi-city trip feel civilized.
Before you book, do two quick checks:
1) Budget for admissions since they’re not included.
2) Decide how fast your group wants to move. This itinerary can be packed, so ask for a pacing plan that matches your energy level.
If that sounds like your kind of travel, you’ll likely find this format is a strong way to get maximum Japan in limited time.
FAQ
How many people is this private tour for?
It’s a private tour where only your group participates, and the group size can be up to 8.
How much does the tour cost?
The price is listed as $385.00 per group.
How long is the experience?
The experience offers from one to four days, with the provided duration listed as 4 days approximately.
Does the tour include pickup and drop-off?
Yes. Pickup and drop-off are offered at hotels, the airport, and other locations where you want.
Is Wi-Fi available during the trip?
Yes. Wi-Fi is available on board during the excursions.
Are admission fees included?
No. Admission fees and sightseeing tickets are not included.
Does the vehicle have power outlets for charging devices?
Yes. The fleets are fitted with 100V AC power supply for charging devices including laptops and cameras during excursions.
Is there a restroom on board?
Restroom on board is listed as not included.
Does the tour use mobile tickets?
Yes. The tour summary indicates mobile ticket availability.
What is the cancellation policy?
You can cancel for a full refund up to 24 hours in advance of the experience start time. If you cancel less than 24 hours before the start time, the amount you paid is not refunded.