REVIEW · KYOTO
Kyoto: Kimono or Yukata Rental with Dressing Service
Book on GetYourGuide →Operated by YUUKAGA Co., Ltd · Bookable on GetYourGuide
Kyoto in a kimono feels instantly real. This rental hands you traditional clothing plus a professional dressing service, right in the Gion area, so you can spend the day exploring like you belong.
I like two things most: first, the wide choice of kimono and yukata designs so you can actually find one that suits your style; second, the staff help you put it on so you’re not wrestling with knots and layers alone.
One consideration: you’re expected to return the kimono by 5:00 PM the same day, so plan your day around that clock and skip anything that runs late.
In This Review
- Key highlights at a glance
- Entering Gion in a kimono: where the day starts
- Choosing the right kimono or yukata (and not getting stuck with something you hate)
- The dressing service: the real value is in the setup
- What you get with the rental (so you don’t have to shop extra)
- A realistic one-day kimono plan around Gion (with smart photo priorities)
- 1) Start near Hanamikoji Street for the “Kyoto in kimono” look
- 2) Use Kennin-ji Temple for a calmer, cultural contrast
- 3) End around Yasaka Shrine for a strong final memory
- A helpful rhythm for your outfits
- Photo stops and optional add-ons: how to get the look you want
- Price and value: is $9 really worth it?
- Practical tips that make the kimono day smoother
- Who this rental is for (and who should think twice)
- Should you book this Kyoto kimono or yukata rental?
- FAQ
- Is kimono included all year, or does it switch to yukata?
- What’s included with the rental outfit?
- Where is the shop and how do I find it?
- Do I need to add a hairstyle or makeup to get the full look?
- How long do I have the kimono to wear?
- Are there any paid add-ons for photography?
- Can I store my luggage at the rental shop?
- What if I need to cancel?
- Is the rental good for people using wheelchairs?
Key highlights at a glance
- Kimono-yukata selection by season: yukata in June–September, kimono in October–May
- Professional dressing help: staff style your look and make sure you’re comfortable
- Instant “complete outfit” basics: Japanese shoes, socks, and a small bag are included
- Gion-area location: about a minute from Exit 1 of Gion-Shijo subway station
- Free luggage storage: drop bags at the shop and walk unencumbered
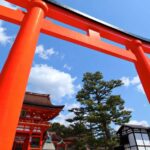
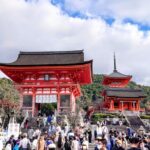
Entering Gion in a kimono: where the day starts
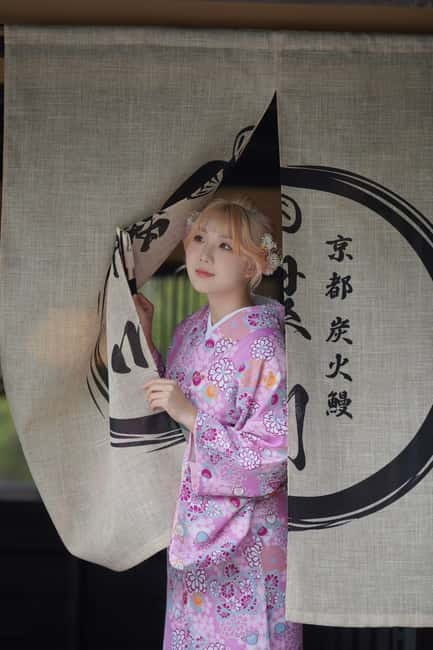
This experience is centered on Kyoto’s Gion neighborhood, one of the city’s most recognizable historic districts. You meet at KIMONO RENTAL MOMO (KYOTO STORE), and yes, the location is convenient: the shop is a 1-minute walk from Exit 1 of Gion-Shijo subway station. That matters because you’re not burning half your day getting to a rental shop.
When you arrive, the workflow is simple. You come in, choose your clothing options, and get fitted. Then you’re dressed and ready to go out exploring. The whole point is to make the “put on a kimono” part feel smooth, not stressful.
If you’re worried about finding the place, look for the board sign so you can spot it quickly. The coordinates are 35.001823, 135.7718985, which helps if you’re using a map app before you step outside.
You can also read our reviews of more tours and experiences in Kyoto.
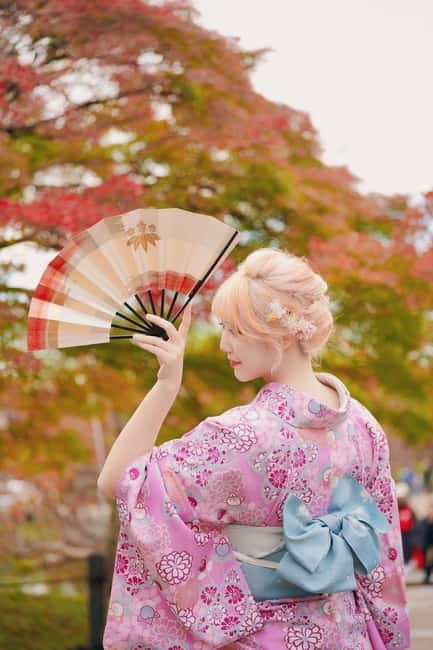
Choosing the right kimono or yukata (and not getting stuck with something you hate)
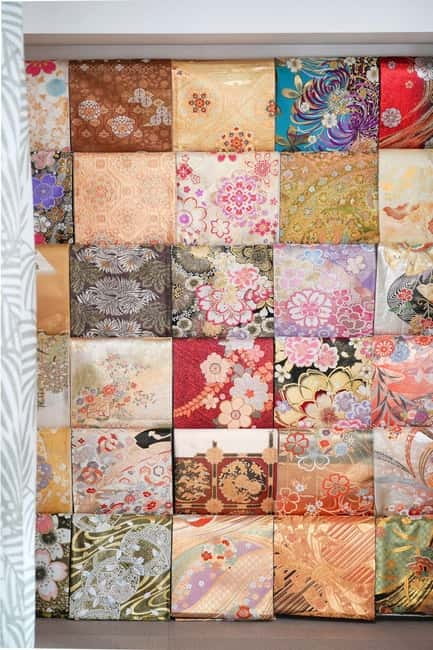
Season drives what you wear here: yukata from June to September, kimono from October to May. That’s a nice, practical detail. Yukata is lighter and casual, while kimono is more structured, so the selection matches the weather pattern people expect in Kyoto.
You’ll get a wide variety of designs. That’s important because kimono photos can look similar online, but what you actually wear on the street can feel very different depending on pattern, color, and how formal it reads. This is exactly the kind of rental where you want to spend a few minutes picking something that feels like you.
Sizes are available in a range, but if you have specific needs, contact the shop in advance. That small step can prevent the “almost works” problem, like sleeves that fall awkwardly or a fit that feels tight across the waist.
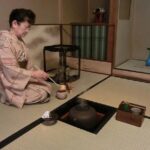
The dressing service: the real value is in the setup
The best part of this rental is the professional assistance. Staff help you put on your kimono or yukata, and they’re also there to help with styling choices and accessories. That means you’re more likely to end up with a look that feels right, not just clothing that’s technically on your body.
Plan to arrive about 10 minutes before your scheduled appointment. You want extra time for fitting and adjustments, especially if it’s your first time wearing traditional garments. The shop also recommends advance booking so your preferred style is more likely to be available.
In practice, a good dressing service changes everything:
- You walk out ready to move, not adjusting constantly.
- You can spend your time on the streets, not inside the shop fixing issues.
- You get a cleaner overall look for photos and sightseeing.
Recent visitors also highlight how organized the team is, and they call out the quality and timing of added hair styling when they choose it. That’s a good sign if you want a polished final look without losing your whole day.
What you get with the rental (so you don’t have to shop extra)
This package includes the essentials that turn a rental outfit into a complete one:
- Hanhaba Obi (half-width belt)
- Japanese small bag
- Socks
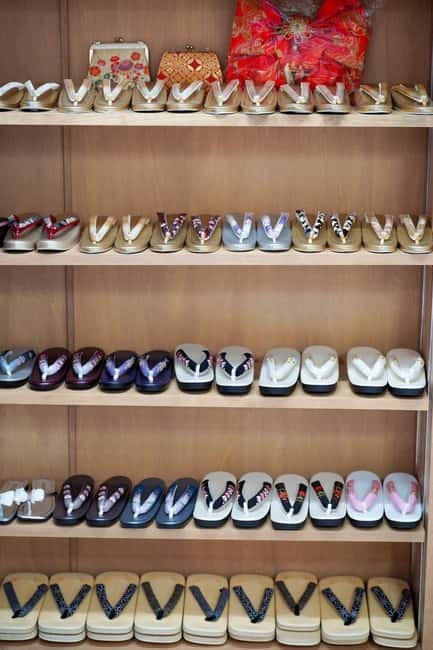
- Japanese shoes
- Free luggage storage
That list matters. Plenty of kimono rentals stop at the robe and belt. Here, you’re also given the footwear and a small bag, so you’re not improvising with wrong shoes or trying to carry everything in a bulky tote.
The hanhaba obi is a practical choice. It’s half-width, which tends to be easier to handle than wider styles, and it helps the look stay balanced while still feeling authentic.
Shoes and socks are included too, which saves you from a common first-timer mistake: wearing the wrong kind of footwear and then spending the walk trying to adapt. With the proper shoes, you can move more comfortably through Kyoto’s temple streets and photo stops.
Luggage storage is free. That’s huge if you’re traveling with bags and want to explore hands-free near Gion.
A realistic one-day kimono plan around Gion (with smart photo priorities)
After you’re dressed, you explore the historic district near Gion—specifically, you’re close to places like Kennin-ji Temple, Hanamikoji Street, and Yasaka Shrine. The package itself doesn’t promise a guided walking route with narration, but it does set you up with the location and the outfit so you can build your own day.
Here’s how I’d structure your time so you actually enjoy it (and don’t feel rushed):


1) Start near Hanamikoji Street for the “Kyoto in kimono” look
Hanamikoji Street is the kind of place where the outfit does part of the work for you. You get that classic Kyoto streetscape feeling quickly, and it’s easier to plan photo angles because the street setting is already so photogenic.
Move slowly. In kimono, your stride changes, and that’s not a problem. It actually helps you take in details instead of sprinting to the next stop.
2) Use Kennin-ji Temple for a calmer, cultural contrast
From the Gion area, Kennin-ji is one of the nearby major stops. I like giving yourself at least part of your time for something more grounded than street photos, and temples do that. You’ll also get a sense of Kyoto’s everyday rhythm: visitors, locals, quiet corners, and slower walking.
3) End around Yasaka Shrine for a strong final memory
Yasaka Shrine is another top nearby landmark. It’s a good place to end because it’s recognizable and it gives you a clean “wrap up” point for your kimono day before you head back to change.
A helpful rhythm for your outfits
Keep your day moving, but don’t overpack it. Traditional clothing takes a bit of getting used to, and Kyoto sidewalks can involve stairs and uneven sections in older districts. If you keep your stops to a manageable list, you’ll spend more time enjoying the look and less time thinking about it.
And remember the deadline: you’ll need to return the kimono by 5:00 PM the same day.
Photo stops and optional add-ons: how to get the look you want
The rental includes the base outfit and accessories, plus staff recommendations for photo opportunities and sightseeing spots in the surrounding area. That’s useful because they can point you toward angles and areas that match your outfit style.
But there’s also an upgrade path if you want extra finishing touches:
- Hairstyle design: additional fee of 1,500 yen
- Makeup service: additional fee of 6,600 yen
- Photographer service: 8,800 yen every half hour
The key is thinking about value. If you’re taking your own photos, the included items plus a hairstyle add-on can be enough. You’ll look more “done,” and you won’t necessarily need a full paid photo session.
Also, multiple customers specifically praise hair styling for being beautiful and done quickly. So if you’re considering the hairstyle option, this is one of the add-ons most likely to improve your experience without eating up hours.
Price and value: is $9 really worth it?
The price listed is $9 per person for a 1-day experience. On paper, that sounds almost too low for kimono plus shoes, socks, a small bag, and professional dressing help. The value part is the bundle: you’re not paying separately for the robe, accessories, and the “how do I wear this” solution.
Here’s where the value becomes real for you:
- You save time by getting dressed with staff help instead of figuring it out yourself.
- You save money by getting shoes and a bag included, rather than buying or renting those separately.
- You save hassle with free luggage storage, so you can keep walking without dragging bags around.
Just watch one thing: many of the most “Instagram-ready” upgrades cost extra. Hairstyle and makeup are optional, and a photographer service runs by half hour. So the best way to judge value is to decide what you want the day to be:
- A casual Kyoto stroll with great photos using your phone: you’ll likely be happy with the standard package.
- A more polished look: add hairstyle, maybe makeup if that fits your style.
- A full photo shoot: only do the photographer add-on if you know you want that structure and pace.
Practical tips that make the kimono day smoother
A kimono day can be easy if you plan for the basics. Here are the details that matter most:
- Arrive early for fitting: about 10 minutes before your appointment helps the dressing stay calm.
- Return on time: the kimono must be returned by 5:00 PM the same day.
- Choose comfortably: pick a design you like, but also something that you feel good moving in.
- Ask about sizing ahead of time if you have special requirements.
- Bring no smoking into your plans: smoking isn’t allowed.
Also, if you’re using public transit, the shop’s subway proximity is a big win. You can build your sightseeing day without stressing about getting across town with a changing outfit.
Who this rental is for (and who should think twice)
This is a strong choice if you want a Kyoto experience that looks iconic fast. It’s especially good for:
- First-timers who want help putting on a kimono
- People who care about the styling details (staff assistance with accessories and presentation)
- Visitors exploring the Gion area and nearby highlights like Kennin-ji, Hanamikoji Street, and Yasaka Shrine
It may not be a fit if:
- You’re pregnant (marked not suitable)
- You rely on a wheelchair (the info says wheelchair accessible, but also marked not suitable for wheelchair users—so you’ll want to confirm directly with the shop before planning)
If that applies to you, it’s worth contacting the shop so you understand what the route, fitting area, and walking experience will be like.
Should you book this Kyoto kimono or yukata rental?
I’d book it if your goal is simple and high impact: get dressed correctly, walk around Gion comfortably, and come away with photos that look like real Kyoto—not just a costume.
Book it especially if:
- You want professional dressing and included footwear and bag
- You like the idea of picking from many kimono designs
- You’re happy to plan your day with a 5:00 PM return in mind
Skip or reconsider if you need a longer evening plan, or if you’re unsure you’ll want optional upgrades like hairstyle or makeup. The base rental is a great start, but the extra services are what push it into a more time-structured, more expensive day.
If you want a fun Kyoto day with a clear starting point and an easy outfit setup, this kimono or yukata rental is a smart, good-value way to do it.
FAQ
Is kimono included all year, or does it switch to yukata?
Yukata is included from June to September, and kimono is included from October to May.
What’s included with the rental outfit?
You get Hanhaba Obi (half-width belt), a Japanese small bag, socks, Japanese shoes, and free luggage storage.
Where is the shop and how do I find it?
The meeting point is KIMONO RENTAL MOMO (KYOTO STORE), near Gion-Shijo subway station (Exit 1). The coordinates are 35.001823, 135.7718985.
Do I need to add a hairstyle or makeup to get the full look?
Hair styling and makeup are not included. You can add hairstyle design for 1,500 yen and makeup service for 6,600 yen.
How long do I have the kimono to wear?
It’s a same-day rental. You must return the kimono by 5:00 PM.
Are there any paid add-ons for photography?
Yes. Photographer service is available for 8,800 yen every half hour.
Can I store my luggage at the rental shop?
Yes. Free luggage storage is included.
What if I need to cancel?
You can cancel up to 24 hours in advance for a full refund.
Is the rental good for people using wheelchairs?
The info lists wheelchair accessibility, but it also says the activity is not suitable for wheelchair users. If this applies to you, it’s best to confirm details with the shop before booking.