REVIEW · KYOTO
Kyoto: Ninja Weapon Forging Experience
Book on GetYourGuide →Operated by Kendo Experience · Bookable on GetYourGuide
Ninja tools start as hot metal. This Kyoto workshop lets you craft your own shuriken or kunai using real steel and guided steps, from furnace heat to a finished souvenir you can pack for home. It’s also easy to reach on foot from Hieizanguchi Station, so you’re not burning half your day just getting there.
I love the hands-on feel: you don’t just watch. You’ll hammer heated steel (about 800°C), refine the shape, sharpen, and polish until your weapon looks and feels like yours. I also really like the personalization moment, when you choose a kanji character and watch the engravers (like Yok) help turn it into a signature you’ll want to keep.
One thing to plan for: some weapon options can cost extra (the kunai has an additional ¥3,000 fee), and travel rules mean you must pack the finished piece in checked luggage, not carry-on.
In This Review
- Key highlights at a glance
- Kyoto ninja weapon forging: what you’re really making
- The 150-minute flow: from uniform to finished weapon
- 1) Suit up like a blacksmith
- 2) Choose your weapon: shuriken styles or kunai
- 3) Heat the steel: the furnace moment
- 4) Shaping and refining
- 5) Kanji engraving: your personal signature
- 6) Ninja knowledge session
- 7) Blackening the steel and final polish
- Forging with real steel: why this feels different from typical crafts
- You get the full arc of blacksmith work
- You’ll feel the pace and focus
- The staff energy helps
- Shuriken vs kunai: choosing your weapon like a decision, not a guess
- Shuriken options (included)
- Kunai option (extra ¥3,000)
- The kanji engraving and take-home box: the souvenir part that actually matters
- Your kanji character turns it into a message
- You get a gift-ready presentation
- Photo and video moments are encouraged
- Ninja knowledge, blackening, and the finishing details
- The ninja session connects craft to culture
- Blackening is more than color
- Getting there from Hieizanguchi Station: small logistics that save time
- Taking your forged weapon home (and on a flight)
- Who should book this Kyoto ninja weapon forging experience
- Should you book this ninja weapon forging class?
- FAQ
- How long is the Kyoto ninja weapon forging experience?
- What weapons can I make?
- Is there an extra fee for the kunai?
- Is the instructor available in English?
- What is included in the price?
- Can I buy replica swords at the studio?
- Can I bring my finished weapon onto a plane?
- Where do I meet for the class?
Key highlights at a glance

- Real steel forging with a furnace around 800°C and guided hammering
- Samue uniform + tenugui head wrap for a full blacksmith training vibe
- Pick shuriken styles or a kunai (kunai has an added ¥3,000 processing/material fee)
- Kanji engraving so your weapon becomes a personal keepsake
- Protective blackening + final polish for a clean, dramatic finish
- Close-to-station location: about a minute on foot from Hieizanguchi Station, then up the hill
Kyoto ninja weapon forging: what you’re really making
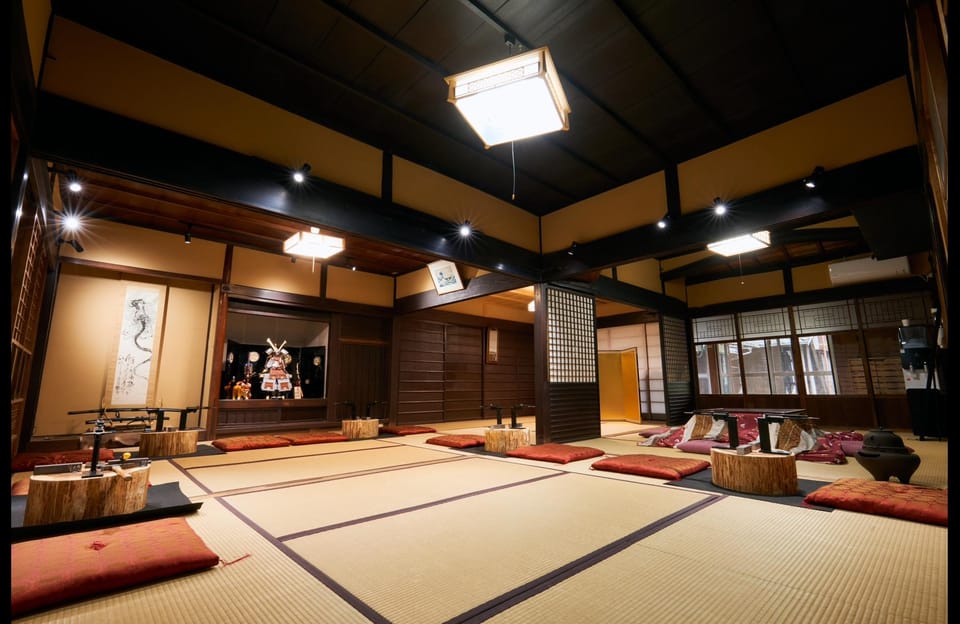
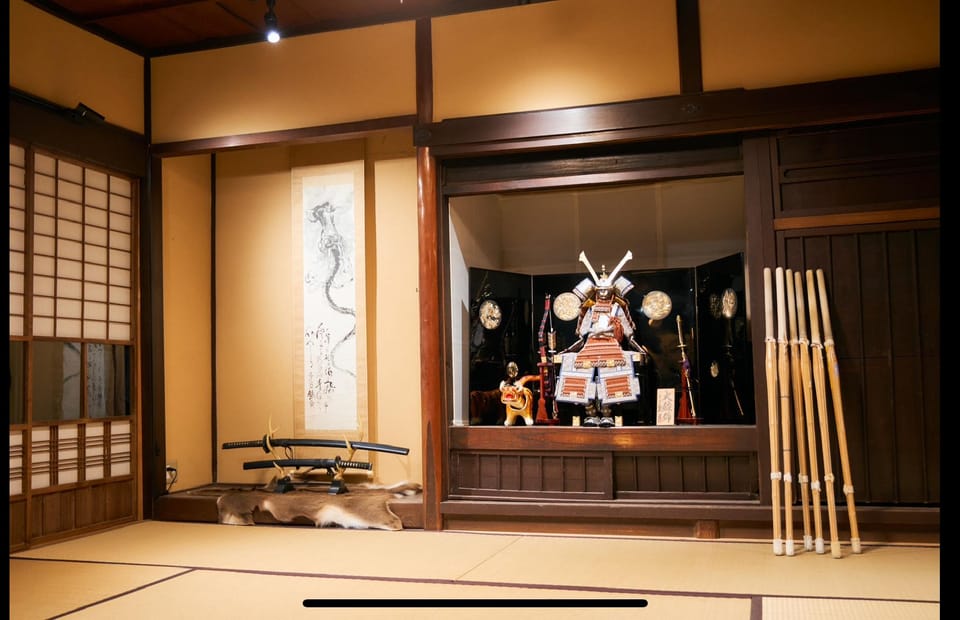
This is the kind of Kyoto activity that feels different the minute you put on the uniform. You start in traditional blacksmith attire—samue—then add the head wrap (a tenugui) to get the atmosphere right away. That matters, because the whole class runs like a compact training session, not a slideshow.
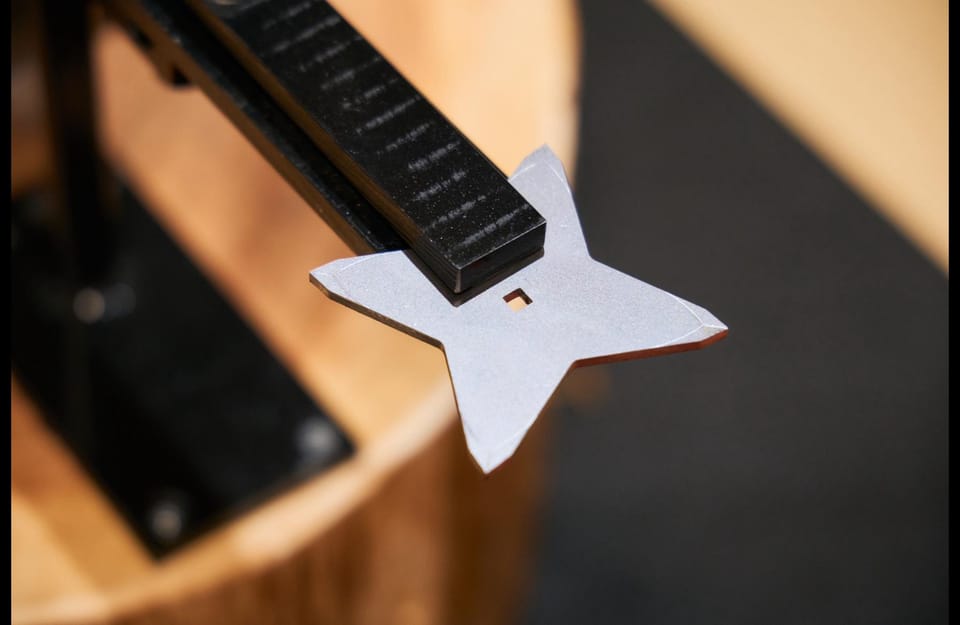
Your final product is a hand-forged ninja weapon you can take home: choose one of the shuriken options or make a kunai. The process is structured so you get a real sense of how steel changes shape through heat and technique, then how finishing turns rough metal into something crisp enough to display.
In practice, think of this as a souvenir you can be proud of. It’s not a store-bought model. It’s the piece you made with your own hands, and that’s why it sticks with you long after you leave Kyoto.
You can also read our reviews of more tours and experiences in Kyoto.
The 150-minute flow: from uniform to finished weapon
The timing is tight in a good way. You’ll move through clear steps, with instructors guiding you before you do each task yourself. From what I’ve seen in the way the team runs the workshop, it’s built for people who want to do, not just watch.
1) Suit up like a blacksmith
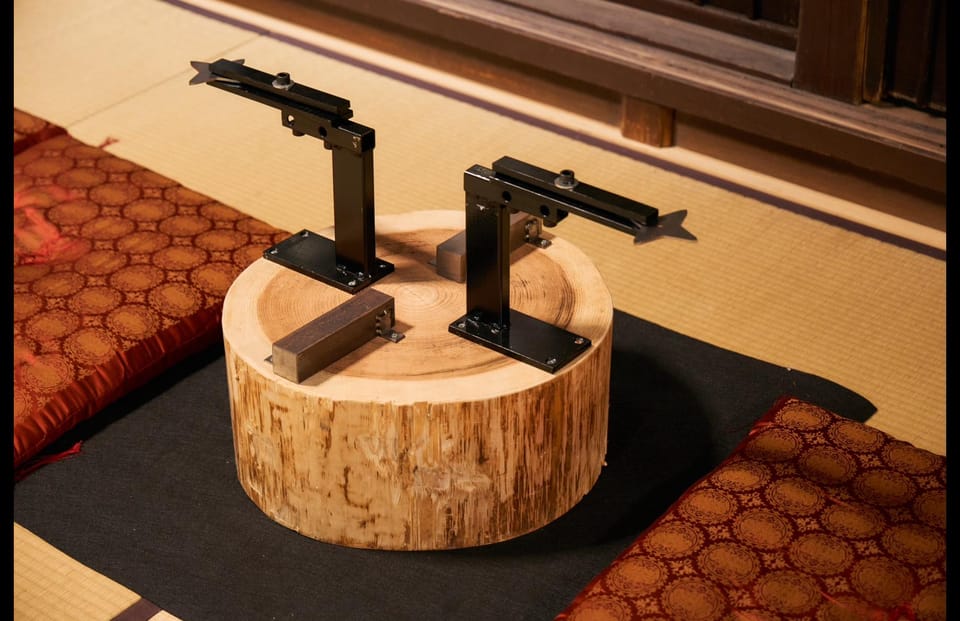
Your class begins with changing into samue, the traditional clothing used by Japanese craftspeople. A tenugui is wrapped around your head, giving you that instant “I’m here to work” feeling. You’ll also be in a studio setting where the staff can explain the tools and safety basics before heat and metal work starts.
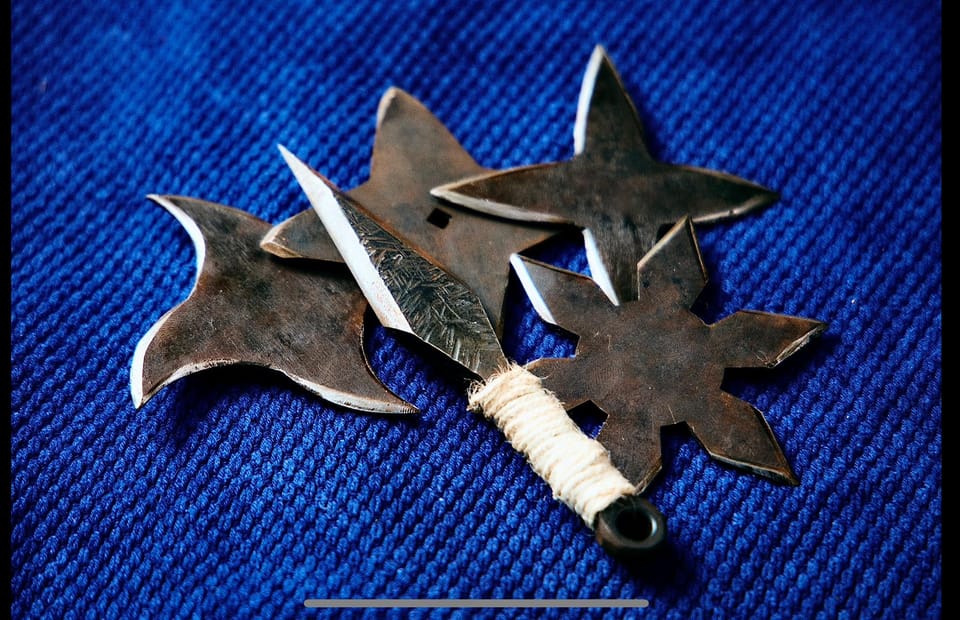
2) Choose your weapon: shuriken styles or kunai
Next, you pick what you want to make. You’ll choose from three shuriken styles, or a kunai. If you want the kunai, you need to select the kunai option when booking, and there’s an extra ¥3,000 fee for processing and material costs.
One practical tip: if you’re undecided, go with the shape you’ll enjoy looking at later. You’ll be living with the final silhouette, not the mythology.
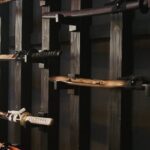
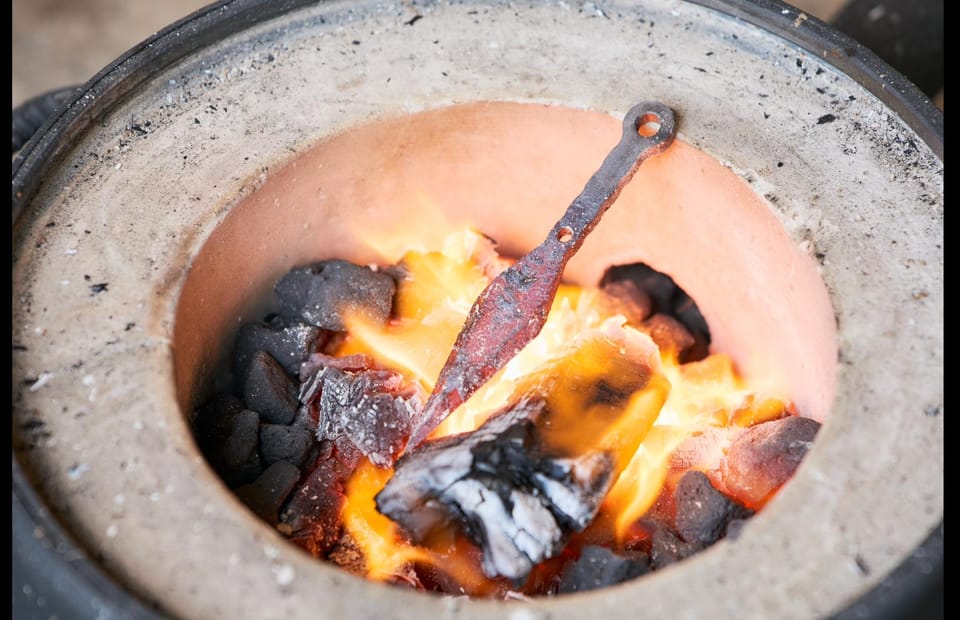
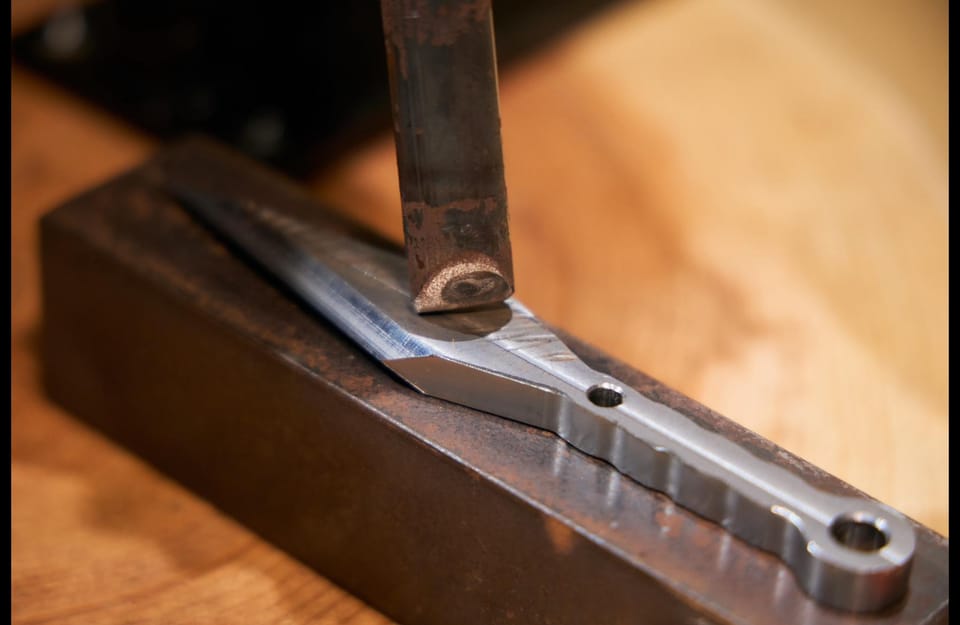
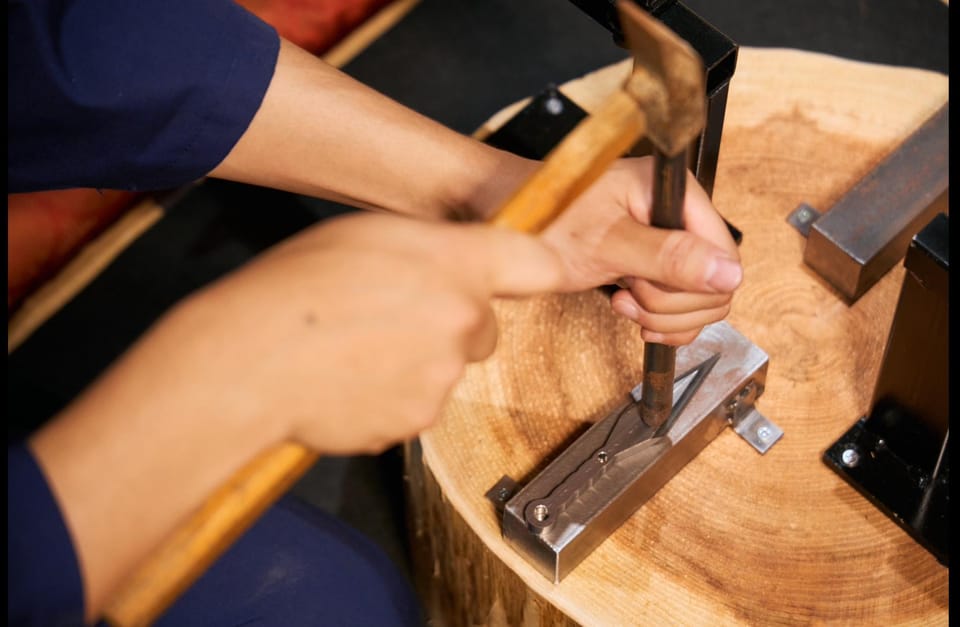
3) Heat the steel: the furnace moment
This is where the class becomes memorable. You’ll watch steel glow in an 800°C furnace, then you’ll hammer the heated metal as sparks fly. You aren’t doing random craft projects—you’re following a method inspired by Japan’s historical blacksmithing traditions.
This is the portion that tends to get the most “how is this even real?” reactions, especially because you feel the metal respond as it cools and changes. It’s tactile learning.

4) Shaping and refining
After forging, the next step is precision. You’ll use a professional belt sander to refine the blade and clean up lines. This is less dramatic than the furnace, but it’s honestly where the weapon starts to look finished.
If you like the moment when something goes from rough to crisp, this part delivers.
5) Kanji engraving: your personal signature
Now you choose a kanji character that inspires you, and the staff helps engrave it carefully. This isn’t just decorative. It turns the object into a message—something you can keep, photograph, and show people back home.
This is also one of the steps where the team’s help really matters. Many people want the engraving to look right, and that’s exactly what you get here.
6) Ninja knowledge session
Between hands-on tasks, you’ll get a short session about ninja history, symbolism, and the ideas behind hidden techniques. It’s there to give meaning to what you’re holding, instead of treating the weapon as a costume prop.
You’ll leave understanding what you made in cultural context, not just as a shiny object.
7) Blackening the steel and final polish
Finally, the metal gets a darkening treatment with a protective solution designed to help prevent rust. You’ll also do the last polishing step so the weapon looks sleek and display-ready.
That blackened finish is what turns “handmade tool” into “dramatic keepsake.” It looks like it belongs in a shadowy story—without turning your project into something impractical.
Forging with real steel: why this feels different from typical crafts
A lot of “make something” experiences are mostly about decorating pre-made items. This one is about changing the metal itself. That’s a big deal.
You get the full arc of blacksmith work
You’ll experience the same major stages people associate with blacksmith craft:
- Heat and forging (with hammering)
- Refining shape
- Sharpening and finishing steps
- Surface protection (blackening) and final polish
Even if you only do small portions of each stage, you still end up with a coherent workflow. That’s what makes it educational in a practical way.
You’ll feel the pace and focus
From the way the instructors run the room, the environment is designed for doing. People often mention the guides keeping it fun and moving, but also keeping the work safe and step-by-step. That matters for first-timers, and it’s why this activity works for families as well as solo travelers.
The staff energy helps
Names you might hear include Taka (often described as energetic), plus team members like Mits, Ako, Yok, and Daiki/Dike. What I like about this setup is that the teaching style stays active—clear instructions, then immediate hands-on time.
Shuriken vs kunai: choosing your weapon like a decision, not a guess
You technically have a choice between shuriken styles and a kunai, but the better way to choose is to think about what you’ll enjoy later.
Shuriken options (included)
You select one of three shuriken styles. These are part of the core class experience, and you’ll go through all the same core steps: forging, shaping, sharpening (as guided), engraving, blackening, and polishing.
If you want something lighter and classic, shuriken usually feels like the most straightforward fit.
Kunai option (extra ¥3,000)
To make a kunai, select it at booking, and plan for the additional ¥3,000 fee for processing/material costs. A kunai also tends to feel more “tool-like” in the final form, which some people prefer for display.
Either way, you’re making something personal. So don’t overthink it. Pick the form that excites you enough to want to take photos with it later.
The kanji engraving and take-home box: the souvenir part that actually matters
It’s easy to judge souvenirs by whether they’re just filled with generic branding. Here, the souvenir has two strong points built in.
Your kanji character turns it into a message
You choose the kanji character, then the staff engraves it with precision. This makes a difference because you’re not stuck with a pre-printed design.
If you care about meaningful travel keepsakes, this step is worth it.
You get a gift-ready presentation
You’ll put your weapon into a beautiful box to take home and cherish. That box isn’t an afterthought. It helps you transport the finished item safely and makes it easy to keep without worrying where it will land when you get back to your room.
Photo and video moments are encouraged
You’ll be able to capture memories with photos and videos of the crafting process. Some instructors even help with filming, which is great if you want more than just a blurry final product shot.
Ninja knowledge, blackening, and the finishing details
The class doesn’t treat the weapon as a costume. It gives you a layer of context so the process feels intentional.
The ninja session connects craft to culture
The ninja knowledge portion covers history, symbolism, and ideas behind hidden techniques. You’ll understand why certain steps matter and how people historically thought about tools and stealth.
If you like cultural context that doesn’t feel preachy, this is the right length.
Blackening is more than color
The steel gets a special solution to darken it and protect it from rust. Then you polish the surface to bring out the final shine.
So you’re not just painting it black. You’re following a protective finishing logic that makes the piece look dramatic and helps it stay presentable.
Getting there from Hieizanguchi Station: small logistics that save time
This workshop is located about a minute on foot from Hieizanguchi Station. You’ll go up the hill with a red postbox in front of the station as your landmark.
A couple practical notes based on how people actually do this day:
- Plan for a short uphill walk. Even if it’s close on paper, it’s still uphill.
- If you’re using a taxi, you can do it strategically to minimize walking time on arrival and departure.
Once you’re there, the studio feels like a workshop, not a tourist trap. That shift helps the day feel focused.
Taking your forged weapon home (and on a flight)
This is the part people forget until the last minute, so I’m glad it’s clearly addressed.
You can bring your weapon home by air, but only in checked luggage. It cannot go as carry-on.
That means you should pack it like a fragile souvenir. Use the take-home box if possible, and plan extra space in your suitcase so you’re not trying to cram it in last minute.
Also note: the studio sells replica swords for a fee. If you’re tempted to add one, just remember it will affect your packing and travel space.
Who should book this Kyoto ninja weapon forging experience

This workshop is a strong fit if you want:
- A hands-on craft where you do the work, not just watch
- A culturally flavored activity that still feels practical (craft + technique)
- A take-home souvenir that’s personal, with kanji engraving and a protective finish
- A day activity in Kyoto that doesn’t require a whole second plan for sightseeing
It may feel less perfect if you:
- Want a purely passive activity with minimal physical work
- Are very nervous about metalwork tools or heat (the staff guides you step-by-step, but it is still forging)
- Are trying to keep the day extremely light on additional costs (kunai adds ¥3,000, and certain weapon types can require extra fees)
Should you book this ninja weapon forging class?
If you’re the type of traveler who values skills you can feel in your hands, you should book. The combination of real steel forging, kanji engraving, and a take-home box makes it more than a novelty. With a 4.8 rating from hundreds of bookings, it has a track record of delivering what most people hope for: a memorable craft session with staff who keep the atmosphere energetic and the instructions clear.
Choose it especially if you want a Kyoto activity that’s not just another photo stop. Make the decision simple: pick the weapon shape you’ll want to display, then show up ready to work.
FAQ
How long is the Kyoto ninja weapon forging experience?
It lasts about 150 minutes.
What weapons can I make?
You can make one of three shuriken styles or a kunai (you’ll choose during booking).
Is there an extra fee for the kunai?
Yes. Making a kunai has an additional fee of ¥3,000 for processing and material costs.
Is the instructor available in English?
Yes. The instructor is English-speaking.
What is included in the price?
Included are the instructor, the weapon-making class, the uniform, the tools, and the weapon you make to take home.
Can I buy replica swords at the studio?
Yes. The studio sells replica swords for a fee.
Can I bring my finished weapon onto a plane?
You can take it home in checked luggage, but not as carry-on luggage.
Where do I meet for the class?
You’ll meet about a minute’s walk from Hieizanguchi Station. Go up the hill where there is a red postbox in front of the station.