REVIEW · KYOTO
Kyoto: Sumi Ink and Brush Calligraphy Experience
Book on GetYourGuide →Operated by JEUGIA Corporation · Bookable on GetYourGuide
Sumi ink starts with your slow grind. I like the suzuri ink-grinding step for the fragrance and color you create yourself, and I also like the hands-on brush practice that teaches you how to hold the pen for different strokes. The main drawback is time: at 50 minutes, you’ll get a solid intro, not a long masterclass.
This is a small-group workshop (up to 6 people) with English or Japanese instruction, so you’re not just watching. You’ll practice, draw bamboo, add characters, and then take home your finished shikisi board as a real, displayable souvenir.
One practical note: it’s indoors, so wear comfy clothes you don’t mind getting a little ink energy on them. The meeting point is near the giant crab sculpture of Kani Doraku, so arrive on time so your session starts cleanly.
In This Review
- Quick hits: what makes this workshop worth your time
- Finding the spot near Kani Doraku (and why timing matters)
- Grinding sumi ink on the suzuri: the sensory warm-up you’ll remember
- Brush technique practice: soku-hitsu first, then choku-hitsu
- Drawing bamboo on the shikisi board: where practice becomes a picture
- Writing your kanji: 竹 for bamboo and 和 for harmony
- Taking it home: your shikisi board as a real souvenir
- Price and value: what $49 covers (and why it feels fair)
- What to bring, what you’ll get, and how to dress for ink work
- Who this workshop suits best (and where to be cautious)
- Should you book the Kyoto sumi ink and brush calligraphy experience?
- FAQ
- How long is the Kyoto sumi ink and brush calligraphy experience?
- What do I make during the workshop?
- Is any calligraphy experience required?
- What languages are available for instruction?
- What is included in the price?
- Where is the meeting point?
Quick hits: what makes this workshop worth your time
- You grind your own sumi ink with an inkstone and water, instead of using pre-made ink
- You learn two core brush techniques: soku-hitsu (side of the brush) and choku-hitsu (upright hold)
- You draw bamboo on a shikisi board using what you practiced right before
- You write kanji next to your bamboo (竹 for bamboo, 和 for harmony)
- You take the finished artwork home and can display it right away
- Small-group instruction (max 6) with an instructor who can explain in English or Japanese
Finding the spot near Kani Doraku (and why timing matters)
Your workshop starts near the giant crab sculpture of Kani Doraku. That’s helpful because Kyoto can feel like a puzzle of alleys—this kind of landmark makes it easier to show up without stress.
Expect to be indoors the whole time. That’s good for comfort (less weather juggling) and it also means your time is focused on the craft. The session is only 50 minutes, so arriving on time matters more than you might think. A late arrival can squeeze practice time, especially when the workshop includes multiple technique steps.
Also, the group stays small and instruction is available in English and Japanese. With a max of 6 participants, you’re more likely to get personal checks on your brush angle and stroke control instead of just following along.
One more practical detail: the ticket line is skipped. That saves a bit of standing around time in a city where lines can be long and your attention span can be short.
You can also read our reviews of more tours and experiences in Kyoto.
Grinding sumi ink on the suzuri: the sensory warm-up you’ll remember
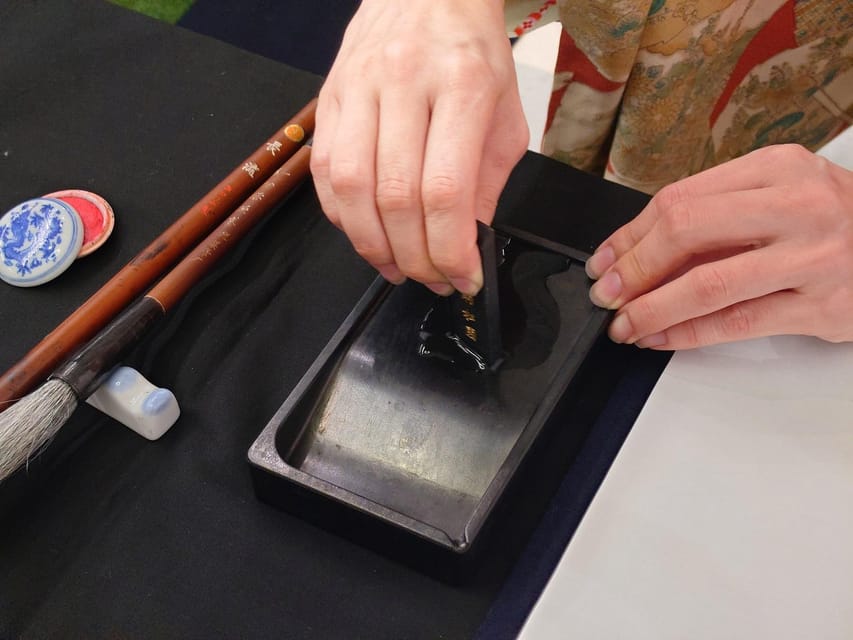
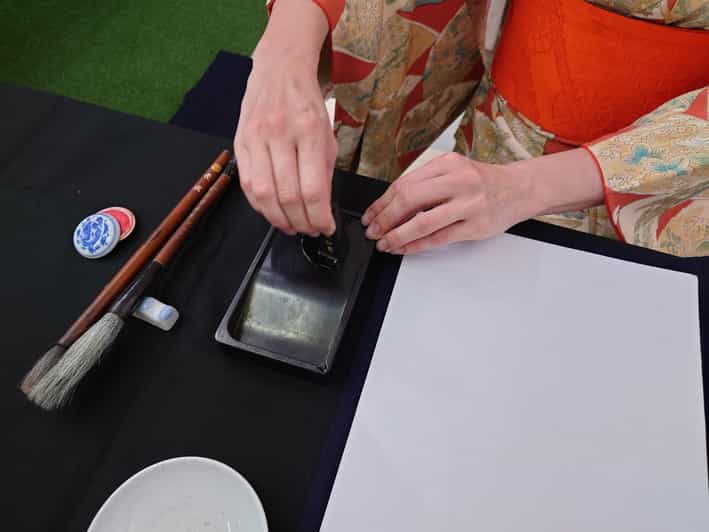
The workshop begins where many calligraphy classes skip ahead: you grind sumi ink yourself using an inkstone (suzuri) and water. You’re not just doing a ritual for fun—you’re making the ink you’ll paint with.
Here’s what I think makes this step genuinely valuable: you learn that the ink isn’t one fixed thing. Grinding changes how it feels and how it behaves on the brush. You also get that distinct sumi ink fragrance, and the instructor’s process encourages you to notice texture and hue rather than rushing.
If you like crafts where the process matters as much as the result, this is the part you’ll appreciate most. It slows you down in a good way. And it also sets you up for success later because you’ve already touched the materials and understand the basics of how the ink works.
The kit is prepared for you, so you’re not hunting for tools. The ink-grinding step is included, and it specifically notes that pre-made ink is not used—this is one of those workshops where the experience isn’t just the final artwork. It’s the making.
Brush technique practice: soku-hitsu first, then choku-hitsu
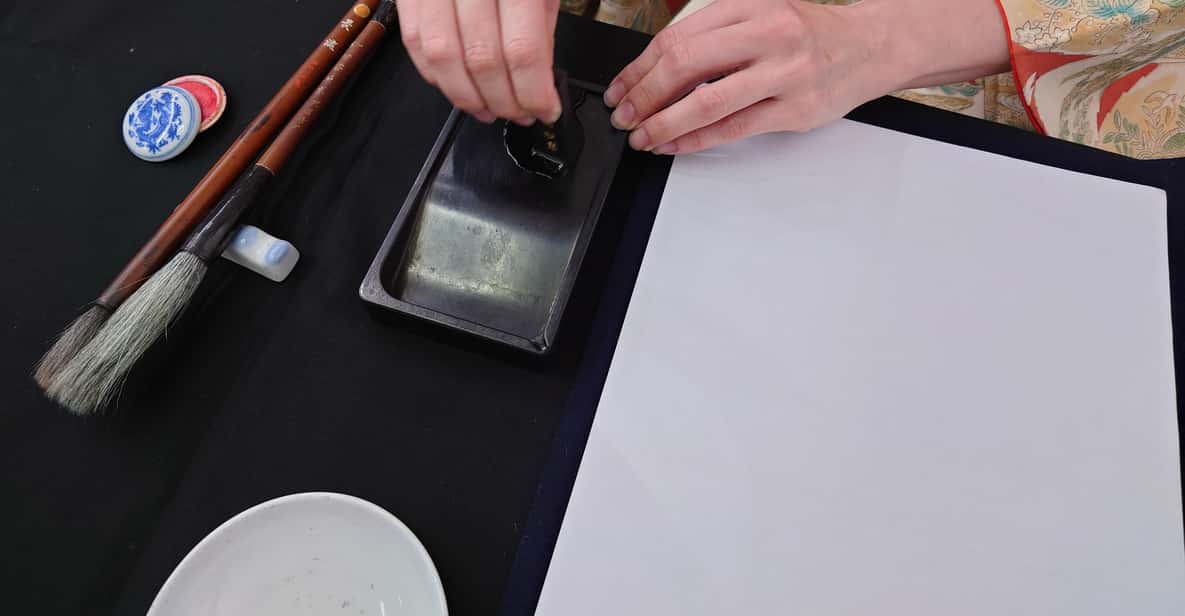
Once the ink is ready, you move into brush technique. This is where the workshop becomes more than a souvenir photo op.
You start with soku-hitsu, practicing with the side of the brush. That changes the line quality and helps you learn stroke direction and how the brush tip interacts with the surface. Think of it as learning how the brush behaves before you try to form something recognizable like bamboo.
Then you switch to choku-hitsu, where the brush is held upright. This is a totally different control challenge. Holding the brush upright changes pressure, motion, and how confidently you can create cleaner edges on your strokes.
What you can take from this, even if you’re a complete beginner:
- You get a feel for brush angle, not just a single “right move”
- You practice the tool in two modes so your bamboo later has more stability
- You’re taught step-by-step, which helps you avoid the frustration of guessing
The workshop includes guidance on brush techniques and drawing bamboo, so you’re not left alone with the idea of calligraphy. The pace is designed so you practice enough before moving to the bamboo stage.
Drawing bamboo on the shikisi board: where practice becomes a picture
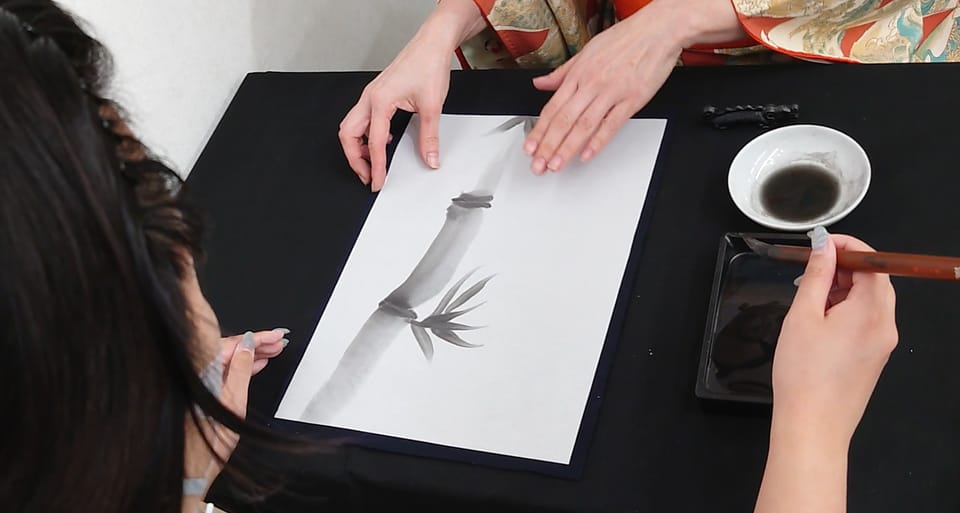
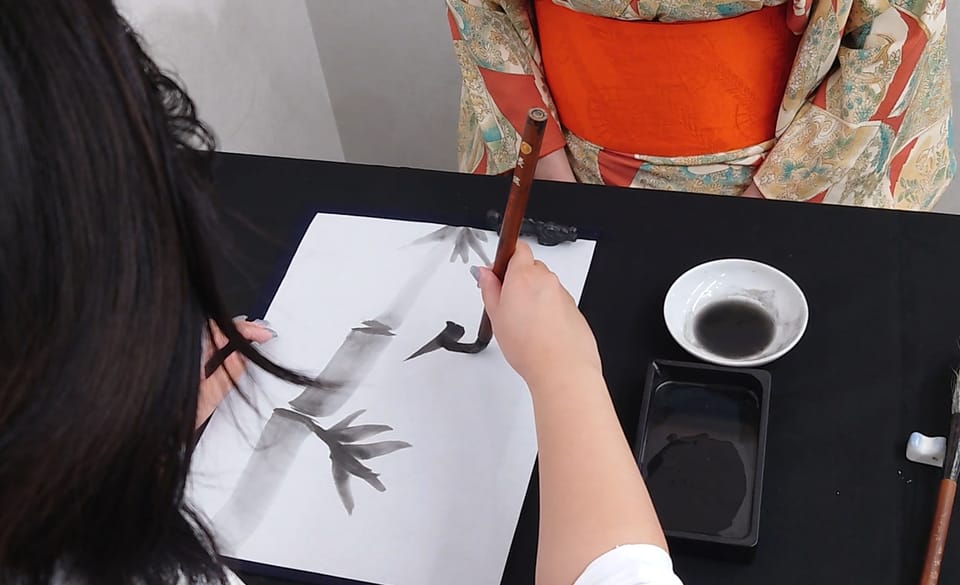
After you warm up with ink and strokes, you draw bamboo on a shikisi board. This is the moment the workshop clicks from technique into a result you can actually keep.
Bamboo is a great choice for beginners because it’s recognizable and it teaches useful calligraphy concepts at the same time:
- You can practice line variety (thicker, thinner, and changing pressure)
- You build structure with multiple strokes
- You learn to keep the brush moving with intention
You’ll draw bamboo using the techniques you practiced, so your soku-hitsu and choku-hitsu practice isn’t wasted. The side-of-brush control helps with certain parts of the design, and the upright grip helps with cleaner, more deliberate strokes.
A nice part of this setup: everything is prepared for you. No tool confusion. No hunting for surfaces. You just show up with your clothes and your attention, and the workshop gives you a clear path from blank board to something finished.
The experience is indoors, and you can take your time within the 50 minutes to get comfortable. You’re not sprinting through steps; you’re building.
Writing your kanji: 竹 for bamboo and 和 for harmony
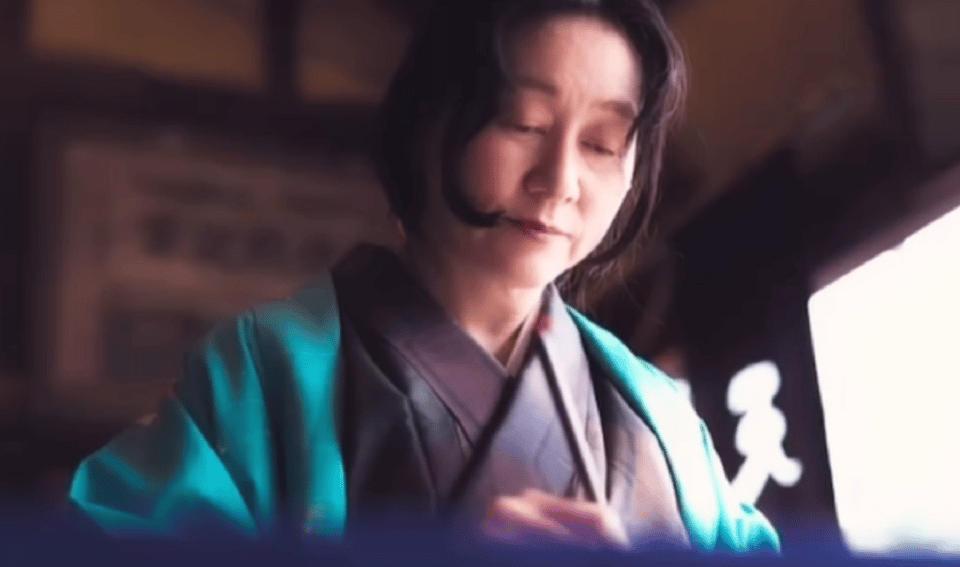
The last creative step is writing characters next to your bamboo. You’re given specific kanji options, including:
- 竹 (bamboo)
- 和 (harmony)
What I like about this part is that it turns the piece from a bamboo drawing into a personal statement. It also gives you an easy way to follow along without needing prior calligraphy experience. The workshop notes that no prior calligraphy experience is required.
You also have flexibility. If you want other characters, you can let the guide know, and the instructor will write them for you. That means you can still get a customized souvenir without the pressure of doing unfamiliar kanji correctly on your first try.
After practicing several times, you write your characters next to the bamboo you’ve drawn. Then you take the finished shikisi board home. That take-home detail matters: you’re not just learning in the moment, you’re creating a lasting object that fits into your life back home.
Taking it home: your shikisi board as a real souvenir
Most Kyoto experiences give you something you can photograph. This one gives you something you can hang, place, or display.
The workshop explicitly says the finished artwork can be taken home. That’s a big value point, because the “memory” becomes physical. It also helps if you’re tired of buying generic souvenirs at the end of a busy day. This is handmade, and it reflects your actual practice: ink grinding, brush technique, bamboo drawing, then kanji.
If you’re short on time while in Kyoto, this is also a practical win. At 50 minutes, it’s long enough to produce something satisfying, but short enough to fit into a day that’s already packed with temples and neighborhoods.
One more comfort note: you’ll be loaned an apron so your clothes won’t get dirty. Still, wear comfortable clothes since ink work is inherently messy-by-nature, even with careful handling.
Price and value: what $49 covers (and why it feels fair)
The price is listed at $49 per person for a 50-minute session. At first glance, it’s not a “cheap craft,” but the value comes from what’s included.
You’re paying for:
- Inkstone setup (suzuri) and ink-grinding guidance
- Brush technique instruction (including two specific stroke methods)
- Shikisi board materials and the step-by-step help to draw bamboo
- Time with an instructor who can explain in English or Japanese
- A finished artwork you take home
You’re not paying for a demo you watch from the sidelines. You’re doing the steps yourself: grinding ink, practicing strokes, and creating the bamboo and characters. The small group size (limited to 6) supports that value because the instructor can focus on your technique instead of managing a large crowd.
A couple details also support the convenience side: the ticket line is skipped, transportation isn’t included, and you can cancel up to 24 hours in advance for a full refund. There’s also a reserve now & pay later option, which helps if you’re still reshuffling your Kyoto schedule.
If you’re the type of person who likes making one good thing instead of buying several small ones, this workshop fits that mindset.
What to bring, what you’ll get, and how to dress for ink work
The workshop is indoors, but they still suggest practical items:
- Comfortable shoes
- Hat and sunscreen
- Water
- Comfortable clothes
Even if you’re mostly inside, you may still walk to the meeting point near Kani Doraku, wait briefly, or take a quick break before/after. The hat and sunscreen guidance makes sense in that real-world way.
You’ll be loaned an apron so your clothes don’t get dirty. That’s a relief, especially if you’re traveling in lighter fabrics.
One thing to plan for: you’re working with ink and water. Even with an apron, keep your expectations reasonable. This isn’t a spotless studio activity. It’s a tactile, hands-on experience.
Also, wear clothes you can move in comfortably. Brush practice works best when your posture feels stable.
Who this workshop suits best (and where to be cautious)
This activity is designed for beginners. It says no prior calligraphy experience is required. So if your handwriting feels more like chaos than art, you’re still in the right place.
It also suits you if:
- You want a calm, focused indoor activity in Kyoto
- You like learning techniques, not just following a single step
- You want a takeaway that looks good displayed later
- You prefer small-group instruction (up to 6)
Caution if mobility is a factor. The info includes wheelchair accessibility, yet it also marks the activity as not suitable for wheelchair users. If you or someone in your group uses a wheelchair, don’t guess—confirm suitability with the provider before booking.
Also, because the session is only 50 minutes and includes multiple stages (grinding, brush practice, bamboo, then kanji), it’s best if you can arrive on time and stay present through the full session.
Should you book the Kyoto sumi ink and brush calligraphy experience?
Book it if you want a hands-on Kyoto activity with a real result at the end of the hour. The standout value for me is the sequence: you grind your own ink, you practice two core brush approaches, and then you use those skills to draw bamboo and write kanji. That structure makes the souvenir more meaningful than most quick craft stops.
Skip it if you need a longer course. This is intro-level by design, and the 50-minute schedule won’t turn you into a calligraphy pro. Also think twice if you’re sensitive to mess, even with an apron.
If you’re weighing it against other Kyoto plans, this is one of the better choices for people who enjoy making, not just seeing. And the fact that you take the finished shikisi board home makes the time feel productive, not just entertaining.
FAQ
How long is the Kyoto sumi ink and brush calligraphy experience?
It lasts 50 minutes.
What do I make during the workshop?
You create bamboo on a shikisi board and write characters next to it, with the finished shikisi board taken home as a souvenir.
Is any calligraphy experience required?
No prior calligraphy experience is required. The instructor guides you through the process and brush techniques.
What languages are available for instruction?
Instruction is available in English and Japanese.
What is included in the price?
Included are all necessary calligraphy tools, an inkstone (suzuri) for grinding sumi ink, a shikisi board, and guidance on brush techniques and drawing bamboo.
Where is the meeting point?
It is near the giant crab sculpture of Kani Doraku.