REVIEW · KYOTO
Kyoto: Hop-on Hop-off Sightseeing Bus Ticket
Book on GetYourGuide →Operated by Myojo bus Co. · Bookable on GetYourGuide
Kyoto is easier when you stop chasing trains. This hop-on hop-off bus gives you a comfy, no-fuss way to reach the big sights, with an open-top double-decker for panoramic views and onboard audio in 7 languages. I like that you can show a mobile voucher and hop on/off at the stops you want, instead of building a rigid day plan around transit.
Two things I really appreciate: the route hits the must-see cluster around UNESCO-listed Nijo Castle, Kinkakuji (Golden Pavilion), and Kiyomizu-Dera—and the bus layout lets you spend time at each place at your own speed. A real consideration: the top deck is direct sunlight, and bus service can be interrupted in severe weather like thunderstorms or typhoons.
In This Review
- Key Takeaways
- Buying a 1- or 2-Day Pass for Kyoto’s Spread-Out Sights
- Where to Board at Kyoto Station (and Why It Matters)
- Using the Mobile Voucher and Audio Guide Without Getting Stuck
- Open-Top Views: Sun, Raincoats, and Photo Reality
- Route Strategy: Do a Loop First, Then Stay Longer
- Stop by Stop: What You’ll Be Close to on the Route
- Crowds, Timing, and How to Use Your Time Well
- Rules and Comfort Details That Actually Change Your Day
- When This Kyoto Hop-on Bus Is the Smart Choice
- Should You Book This Kyoto Hop-on Hop-off Bus?
- FAQ
- How long is the Kyoto hop-on hop-off bus ticket valid?
- Where is the first boarding stop?
- Do I need a paper ticket?
- Is audio commentary included, and in what languages?
- Is Wi-Fi available on the bus?
- Is the bus top open?
- What happens in rainy weather?
- Can I bring an umbrella on board?
- Are there rules about food and drinks?
- Are entrance fees included?
Key Takeaways
- Hop on and off at any stop using your mobile voucher, with unlimited rides for your ticket validity
- Open-top views make it easier to get the lay of the land across Kyoto
- Audio guidance in 7 languages helps you connect what you see with what it is
- A practical stop network covers major landmarks without you needing to map every transfer
- Plan for sun and rain rules: no umbrellas on board, raincoats are provided in wet weather
Buying a 1- or 2-Day Pass for Kyoto’s Spread-Out Sights
At about $27 per person, this is priced for travelers who want efficiency without turning Kyoto into a sprint. The value comes from the structure: you’re not paying per stop, you’re buying time and flexibility, with unlimited rides during your 1- or 2-day window.
For a quick trip, a 1-day pass can work if you’re picking a short list—think Golden Pavilion plus Gion plus Kiyomizu-Dera. If you want fewer rushed moments (and more time to wander between temple gates and street scenes), the 2-day option tends to make Kyoto feel less like a checklist.
The main thing to understand: this bus is great for getting you between major points. It is not a substitute for deep, slow temple study. You’ll use it to move smart, then step off to do the real exploring at ground level.
You can also read our reviews of more tours and experiences in Kyoto

Where to Board at Kyoto Station (and Why It Matters)
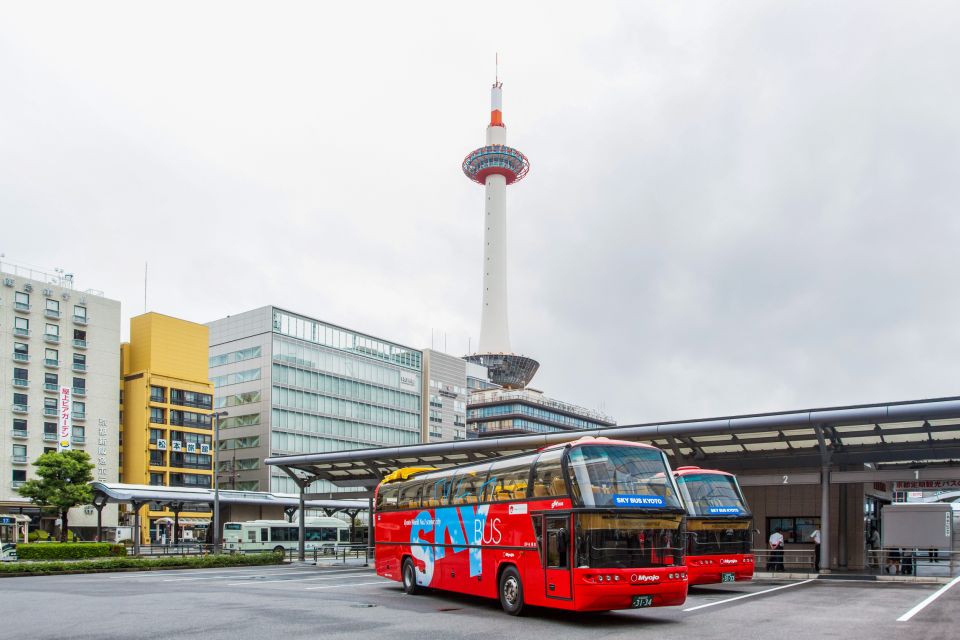
Kyoto Station is the right place to start because it reduces decision fatigue. The bus stop is easy to spot: go out from the north central exit and look directly in front of the Isetan department store.
When you begin at Kyoto Station, you also get a useful advantage: you can ride once to understand the direction of travel and where you want to linger. If you’re arriving with jet lag or you’re new to Kyoto’s transit, this starting point helps you avoid that first-day chaos.
And remember: you can board at any stop along the route. So if you later decide you’d rather start from, say, Nishiki Market or Gion, you can.
Using the Mobile Voucher and Audio Guide Without Getting Stuck
This experience is built around simple boarding. You show your mobile voucher at the stop, hop on, and you’re set.
Onboard, the audio runs in English, French, Japanese, Korean, Chinese, Spanish, and German. That’s a big plus in Kyoto, where many signs and place names move fast if you’re relying on reading alone. It also helps you confirm you’re in the right mental category: temple, castle, shrine, museum area, and so on.
Two practical notes:
- Wi-Fi is temporarily suspended, so don’t count on it to guide your day in real time from the bus.
- The audio is meant for orientation. It’s best used as a quick “what am I looking at” layer, not a detailed lecturer experience.
If you’re picky about sound quality, also keep your expectations modest. Some people report the narration can feel less smooth as the bus approaches stops, so treat it like a helpful overview.
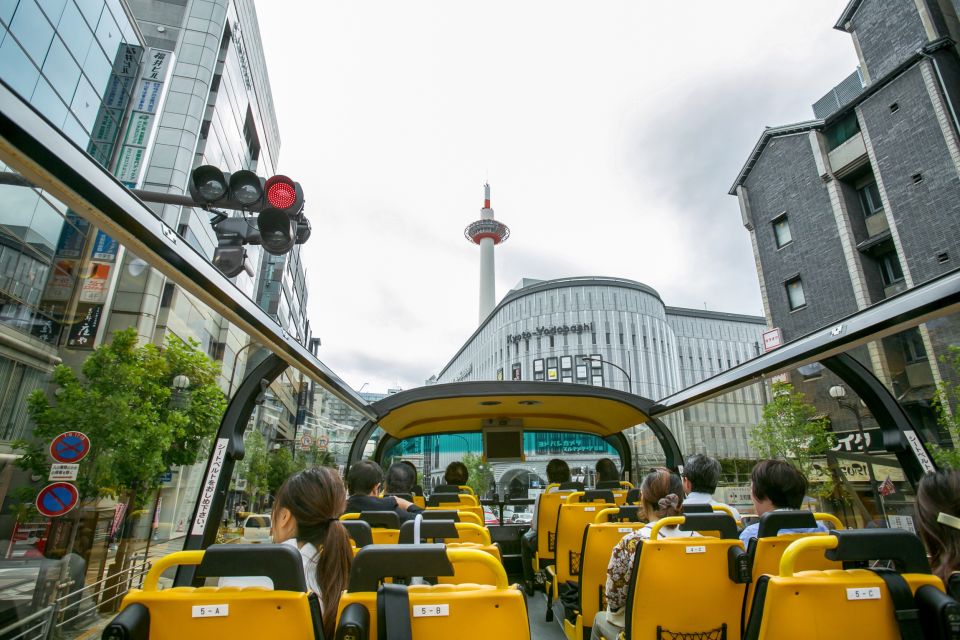
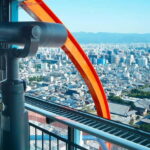
Open-Top Views: Sun, Raincoats, and Photo Reality
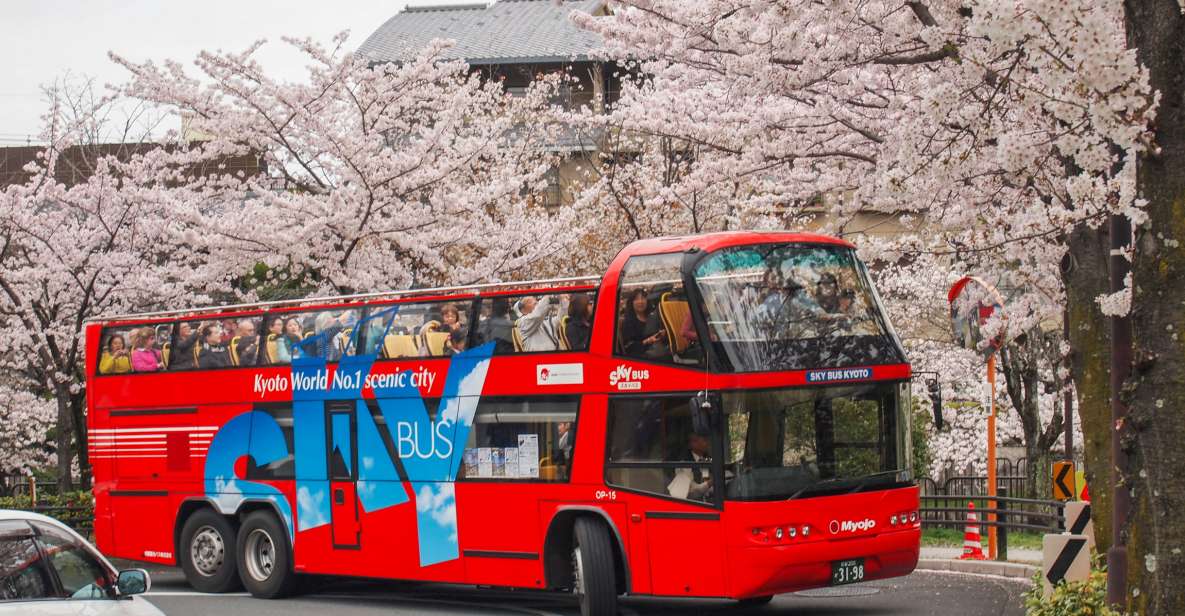
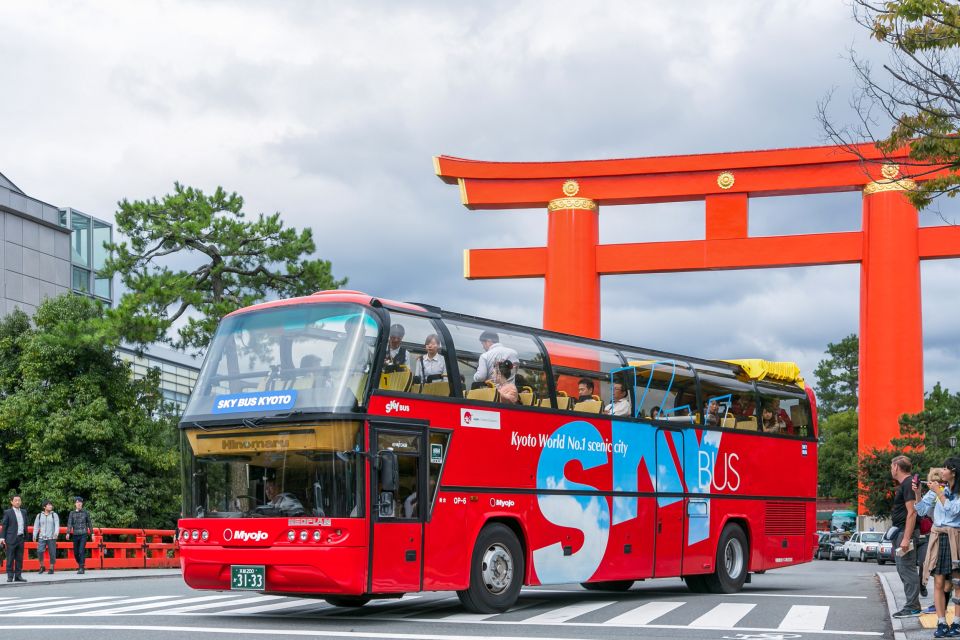
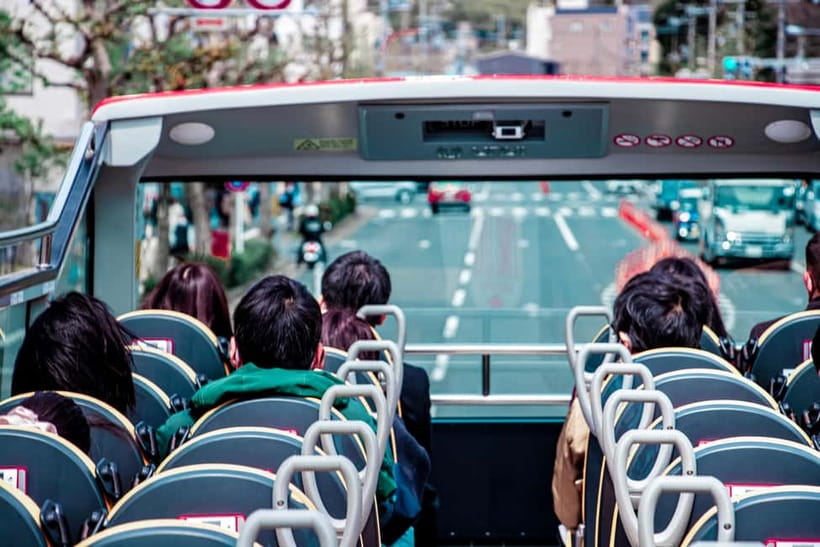
The open-top double-decker is one of the biggest reasons to choose this bus. You get panoramic city views while moving between neighborhoods, and it’s a good way to understand where Kyoto’s different areas sit relative to each other.
But the same feature creates trade-offs:
- The top deck is exposed to direct sunlight, so it can get hot on clear days.
- Umbrellas aren’t allowed on the vehicle, but raincoats are provided in wet weather.
- People also mention that there’s a rain-covered area up top, which can help when skies shift.
One more rule that affects how you capture photos: no selfie sticks. That’s one of the few “don’t bring it” items that can change your travel habits if you’re used to shooting on the go.
Also, don’t assume every attraction will be framed perfectly from your bus seat. Some places look best once you’re walking, and the bus ride is more about getting between scenes than photographing each one at street level.
Route Strategy: Do a Loop First, Then Stay Longer
Here’s the trick that makes hop-on hop-off bus passes feel worth it: ride once for bearings, then build your time around what you actually want. A common rhythm is doing a longer ride first to understand the route and decide where to hop off later.
Some people find the schedule works smoothly, with buses generally running on time. Still, there can be periods with fewer buses (for example, reports of longer gaps around mid-morning), so don’t assume you’ll have a bus every few minutes.
If you’re trying to hit multiple far-out stops in one day, treat this like a transportation tool, not a strict tour timetable. Plan a little breathing room between your drop-offs, especially when certain sites are popular.


Stop by Stop: What You’ll Be Close to on the Route
This route is designed to connect Kyoto’s “big names” without making you wrestle with multiple transfers. Below is what each stop brings you, and how to think about using it.
Kyoto Station
This is your easy anchor point. If you want a low-stress start, it’s the best jump-off. It also helps for rerouting later because you’re back in a major hub with food and shopping nearby.
Nishihonganji (Kyoto Tokyu Hotel)
This is an early stop that’s useful when you want a calmer beginning before the biggest crowd zones. If you’re heading out to temples later, it can be a convenient staging point.
Shijo Karasuma / Nishiki-ichiba Market
This stop is handy for mixing Kyoto’s temple side with the city’s food-and-street vibe. Nishiki-ichiba Market is a natural place to pause before you head toward the more out-in-the-open sight clusters.
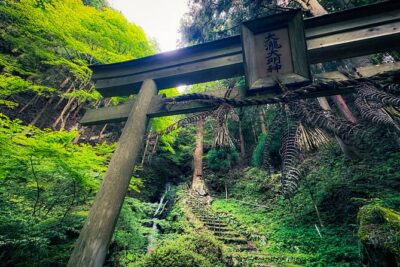
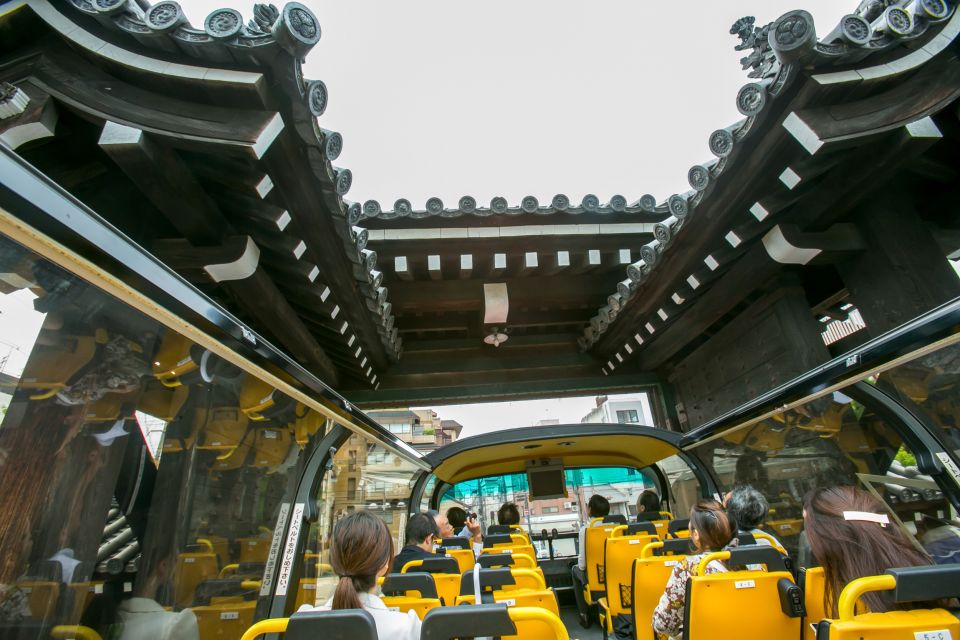
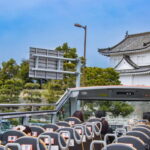
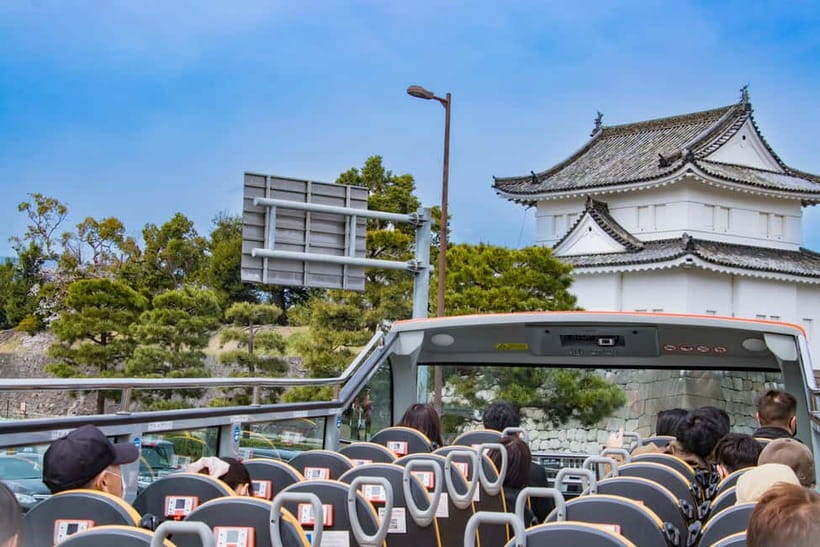
Nijo-jo Castle (Nijo Castle area)
This is one of the UNESCO-listed highlights on the route. If you want to check a castle first, it’s right there—just remember that castle areas can be busy when day-trippers pile in.
Kitano-tenmangu Shrine / Kamishichiken
This stop gives you access to the Kitano-tenmangu Shrine area and the surrounding Kamishichiken neighborhood. Use it if you want a shrine visit that feels a bit different from the heavy temple circuit.
Kinkakuji Temple (Golden Pavilion)
This is another UNESCO-listed superstar. The Golden Pavilion stop is exactly the kind of “I came to Kyoto for this” moment where a hop-on pass earns its keep—less time traveling, more time actually looking.
A practical caution from people who’ve been there: Kinkakuji Temple only accepts cash, and there’s no ATM on the premise. If you’re relying on your phone to pay for everything back home, plan ahead.
Daitokuji Temple
This stop is one of the route’s temple options that helps you vary the day. It’s a good fit if you want another sacred stop after the Golden Pavilion without feeling like you’re repeating the same experience.
Kyoto Imperial Palace (Doshisha University)
This is your bridge between Kyoto’s classic sightseeing loop and the more administrative/campus area around Doshisha. It’s useful if you want a change of pace and space between crowds.
Ginkakuji Temple (Silver Pavilion)
This one is a major stop, and it’s often appreciated because it’s not always included in shorter day tours. The Silver Pavilion stop makes it easier to spend real time there instead of squeezing it in last-minute.
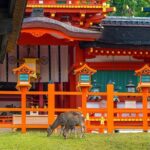
Heian-jingu Shrine / Okazaki Park
This stop ties shrine time to park time in the same general area. If you’re the type who likes walking between photo stops rather than just standing at one gate, this is a good place to slow down.
Gion (Kotowa-Kyoto Yasaka)
Gion is one of Kyoto’s best-known districts, and having it as a bus stop makes the day feel more flexible. Hop off here when you want street atmosphere rather than just temple sights.
Gojozaka (Kiyomizu-dera Temple / Gion)
This is the stop that connects to Kiyomizu-Dera Temple. Kiyomizu-Dera is UNESCO-listed, and the Gojozaka area is a smart drop point if you want to combine temple visiting with the Gion-adjacent vibe.
Sanjusangendo / Kyoto National Museum (Hyatt Regency Kyoto)
This stop works if you want museum time or a cultural detour after the temple circuit. It’s also practical because you can plan a lighter break when you’re temple-downed.
Crowds, Timing, and How to Use Your Time Well
Kyoto’s top sites draw crowds. That’s not a flaw in the bus; it’s Kyoto. The key is to use the pass to control your tempo: don’t try to do everything at peak hours with zero breaks.
Here’s a practical approach:
- Ride through first so you know what you can realistically see without rushing.
- Then choose 2 to 4 main stops for deep time, and use the other stops as optional detours.
- Expect that some sites can be very busy, especially at popular visiting times.
Also, the bus can help reduce confusion. Instead of figuring out which train line to take to get to the next far-out attraction, you ride, then walk the final stretch from the stop.
One more small sanity check: if you want to avoid standing in packed areas, don’t wait until the last minute to board the next bus. If it feels full, it’s usually better to plan to wait for the next one rather than get stressed.
Rules and Comfort Details That Actually Change Your Day
It’s the boring rules that can surprise you mid-trip, so here’s what to keep in mind.
Allowed on board is limited. You can bring soft drinks with lids (plastic bottles and coffee). The rules say no smoking, no food in the vehicle, no alcohol, no umbrellas, and no selfie sticks.
Comfort-wise:
- The top deck is open and sun-exposed.
- Rain protection is handled by provided raincoats, not by bringing umbrellas.
- Some riders like that there’s a rain-covered section upstairs in bad weather conditions.
Finally, expect that bus service depends on weather. If there’s severe weather like thunderstorms or typhoons, the bus may not operate.
When This Kyoto Hop-on Bus Is the Smart Choice
I’d book this bus if you:
- Have 1–2 days in Kyoto and want efficient movement between major landmarks
- Are new to Kyoto transit and want an easy base that starts at Kyoto Station
- Want a flexible plan where you can spend more time at the places that grab you
- Like the idea of open-top views while you travel
I’d rethink it if you:
- Want a deep, detailed lecture experience about each site (the audio is an overview)
- Expect perfect sightlines from the bus for nonstop photos
- Are sensitive to direct sun on an open-top deck, or you hate waiting when buses are less frequent
Should You Book This Kyoto Hop-on Hop-off Bus?
Yes—if your goal is to see Kyoto’s biggest highlights without turning your day into a transit puzzle. The $27 pass makes the most sense when you plan to hit multiple far-out areas like Kinkakuji, Ginkakuji, Gion, and Kiyomizu-Dera, because it trades planning stress for simple hop-on convenience.
If you’re going, a couple of smart prep moves will pay off: bring cash for Kinkakuji, plan around sun on the top deck, and assume the audio is there for orientation, not deep history.
If you want, tell me your travel month and how many days you have in Kyoto. I can suggest a simple hop-off plan using the stops on this route.
FAQ
How long is the Kyoto hop-on hop-off bus ticket valid?
You can choose a ticket valid for either 1 day or 2 days, depending on the option you select.
Where is the first boarding stop?
The first stop is at Kyoto Station, from the north central exit, with the bus stop directly in front of the Isetan department store.
Do I need a paper ticket?
No. You can show your mobile voucher when boarding.
Is audio commentary included, and in what languages?
Yes. Audio commentary is included and is available in English, French, Japanese, Korean, Chinese, Spanish, and German.
Is Wi-Fi available on the bus?
Wi-Fi is listed as temporarily suspended.
Is the bus top open?
Yes. It’s an open-top double-decker, so you will be in direct sunlight on the upper deck.
What happens in rainy weather?
Raincoats are provided in wet weather.
Can I bring an umbrella on board?
No. Umbrellas are not allowed on the vehicle.
Are there rules about food and drinks?
You can bring soft drinks with lids, but food is not allowed in the vehicle and alcoholic drinks are not allowed.
Are entrance fees included?
No. Entrance fees to attractions are not included.