REVIEW · KYOTO
Kyoto Photography Masterclass – Private Photography Lesson
Book on Viator →Operated by Aperture Tours · Bookable on Viator
Kyoto at night turns into a photo lesson you can walk through. This private Kyoto Photography Masterclass is built for real-world shooting, with a pro photographer guiding your angles, camera settings, and composition as you move through famous streets and temples. The best part is that it’s designed to make those lantern-lit scenes actually photograph well, not just look good on postcards.
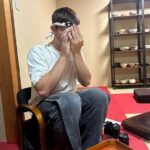
I especially like two things: first, the chance to get hands-on instruction tailored to your skill level, including how to handle difficult night conditions. Second, the way the guide works with you step by step—one review mentioned Irven reviewing your shots and resetting for better results, plus being patient while you tried again.
One consideration: this isn’t a camera rental tour. A camera isn’t included, and while a tripod is available upon request, you’ll want to plan around night gear if you don’t already have your own support.
In This Review
- Key Highlights You’ll Feel Right Away
- What This Private Masterclass Actually Gives You
- Your Lesson Backbone: Settings, Composition, and Night Control
- Where You’ll Shoot: Gion’s Traditional Streets for Storytelling
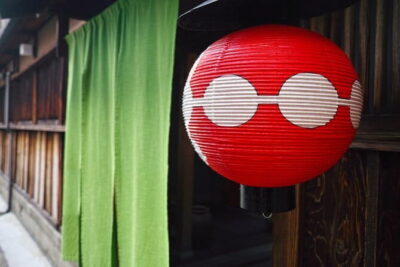
- Pontocho District: Lantern-Light Atmosphere That Tests Your Settings
- Gion Corner and Minamiza: Where Photo Choices Meet Cultural Details
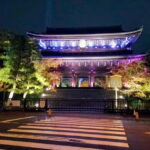
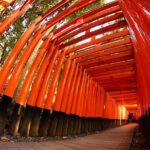
- Yasaka Shrine: A Night-Ready Subject With Strong Light Moments
- Hokan-ji Temple: Texture, Calm, and Learning to Photograph Shadows
- Koju Ninenzaka: Slope Streets and Layered Angles
- Kiyomizudera Temple: The Big Night Finale
- How the 3 Hours Feels (and Why It Works)
- Price and Value: Is $170 Worth It?
- Who This Masterclass Suits Best
- Practical Notes to Help You Get Better Results
- Should You Book It?
- FAQ
- What is included in the Kyoto Photography Masterclass?
- How long is the private photography lesson?
- What does the tour focus on?
- Is a camera provided?
- Is a tripod available?
- Where does the tour start and end?
- Is this a private tour?
- Is there a cancellation option?
- Is it easy to reach the meeting point by public transport?
Key Highlights You’ll Feel Right Away
- Night photography help that’s practical, with long-exposure goals and guidance that makes lantern light behave
- Go-at-your-pace private flow, so you can stop, reshoot, and adjust without a crowd schedule
- Gion and Pontocho photo setups geared toward textures, patterns, and “story” angles
- Shot review during the lesson, so corrections happen fast instead of only after the trip
- Tripod support on request, which matters a lot for sharp results at night
What This Private Masterclass Actually Gives You

This tour is basically a guided photography class you take outside. Instead of sitting and talking for three hours, you’ll be photographing as you go—then using that fresh feedback to improve what you’re capturing. For you, that means less guessing and more control, especially at night when exposure, focus, and camera shake can turn your images into blurry disappointments.
The tour pairs two types of help. You get a professional photographer guide (the person who teaches your camera settings and composition), plus a local English-speaking guide who knows Kyoto’s rhythms and where your best angles come from. That combination is what keeps the lesson grounded in real locations, not generic “try this in any city” advice.
It’s also private. That matters more than it sounds, because night photography often requires slow, careful repositioning. In a group setting you might feel rushed. Here, you can take an extra minute to wait for the right moment, then try the next framing without anyone tugging you along.
You can also read our reviews of more private tours in Kyoto
Your Lesson Backbone: Settings, Composition, and Night Control

The heart of the experience is personalized education—camera settings, composition, and techniques to make your photos stronger. The tour is explicitly built around night shooting challenges, including long exposure and how to keep images readable when the light is mixed (lantern glow plus modern lights plus dark shadows).
In plain terms, you’ll be learning to do three things:
- get the camera to capture the light you want (instead of just making everything bright or just making everything dark)
- compose with purpose (so your image tells a story, not just shows a scene)
- manage the physics of night (mostly tripod, stability, and timing)
One review specifically called out shot review and reset cycles—take a shot, look at it, fix what you can, then try again. That’s a rare format in travel photography, and it’s a great way to learn quickly because you’re not waiting days to see results.
If you don’t know your way around exposure modes yet, that’s fine. The tour is designed to tailor to your skill level. If you already know your settings, you’ll still benefit from in-the-moment composition feedback and location-specific guidance (the “what angle here?” part is where many people struggle).
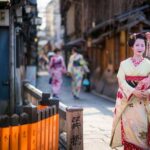
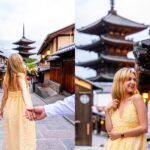
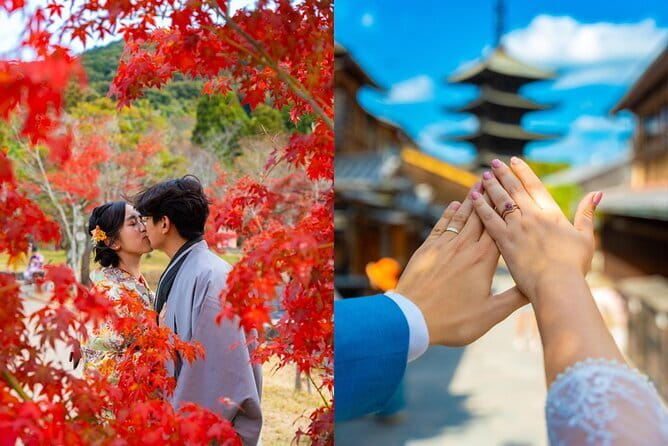
Where You’ll Shoot: Gion’s Traditional Streets for Storytelling
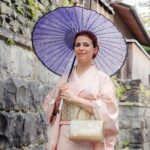
Gion is where Kyoto feels most like Kyoto. You’re looking at the classic side—wooden machiya-style streets and the sense that the city has a slow pulse. For photography, that means texture and pattern: building edges, street lines, shadows under eaves, and the way lantern light interacts with older materials.
This stop is your chance to practice framing with layers. Instead of only photographing a single landmark, you’ll be shooting the streets as a sequence—foreground details, mid-ground subjects, and a background that still feels Kyoto-famous. The pro photographer guide helps you find angles and lighting so your photo looks intentional, not accidental.
A practical tip for you: if you’re used to shooting daytime, night changes how highlights behave. In Gion’s glow, it’s easy to over-brighten the lanterns while leaving the rest too dark. This tour’s night focus is helpful because you’re actively learning how to balance that.
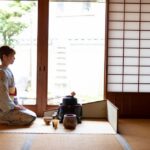
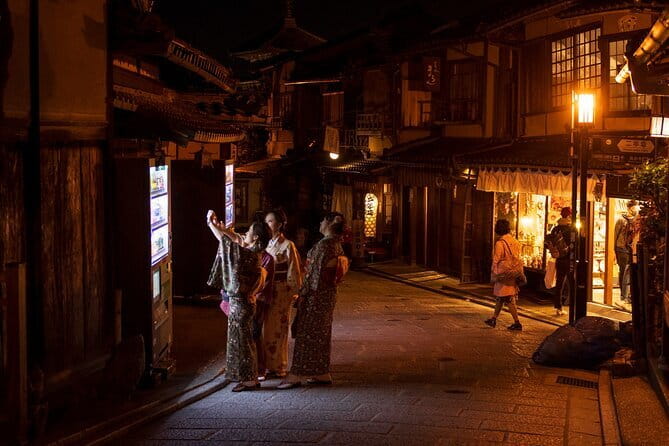
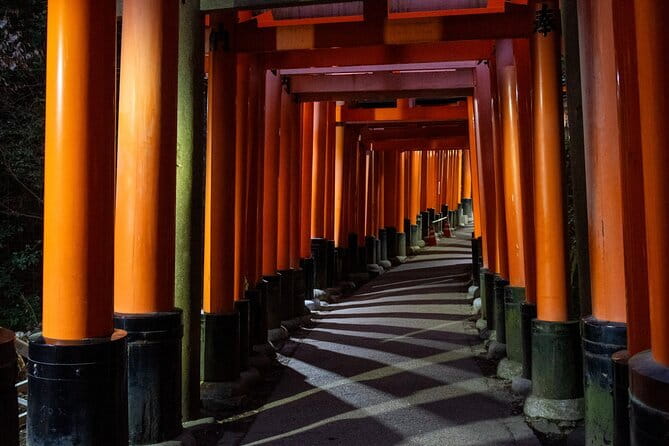
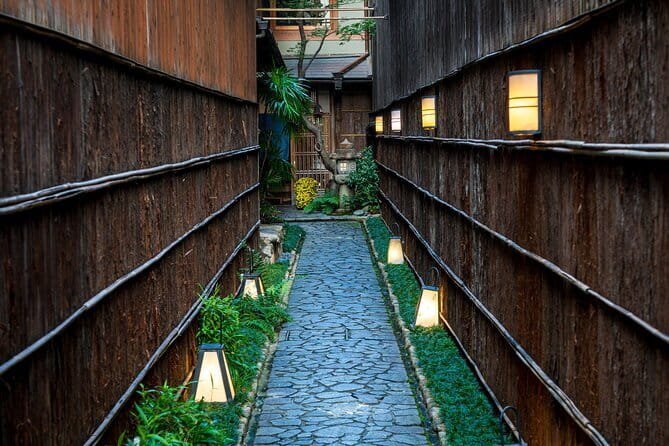
Pontocho District: Lantern-Light Atmosphere That Tests Your Settings
Pontocho is the kind of place that makes you want to take a hundred photos instantly. That’s also where people get disappointed later, because night scenes are unforgiving: small camera shake turns into blur; bright lanterns can blow out; and dark corners hide your subject.
This is one of the tour’s key value stops, because it’s set up for learning night technique. You’re not just wandering—you’re practicing how to make lantern-lit streets look calm and sharp. Long exposure is part of the experience here, and you can expect guidance aimed at keeping your frame under control while still capturing the mood.
One of the best ways to use this stop is to slow down and work a single spot from different compositions:
- a tighter frame that emphasizes lantern glow and surface texture
- a wider frame that includes street lines guiding the eye
- a version with more negative space to let the lights breathe
If you’re traveling solo, that might sound obvious. It’s not obvious when you’re excited and moving quickly. The pro guide’s job is to help you pick the “next try” that improves your photo, not just gives you another similar shot.
Gion Corner and Minamiza: Where Photo Choices Meet Cultural Details
These stops add a different flavor to the lesson. Gion Corner and Minamiza Theater are tied to Kyoto’s performing arts side, which changes what you should look for through the lens. Here, it’s less about empty street beauty and more about how the scene communicates culture—signage, architecture, and the human rhythm around venues.
Photographically, you’ll likely find yourself paying attention to shape and contrast: clean geometry against darker surroundings, warm lighting against cooler shadows, and how people move through the frame. That’s important because night photos often lose their story when the subject is unclear or the frame feels flat.
If you’re hoping for images that feel like Kyoto rather than generic “night street,” this is where you start separating the two. You’re learning how to choose a scene detail that points to place.
You can also read our reviews of more photography tours in Kyoto

Yasaka Shrine: A Night-Ready Subject With Strong Light Moments
Yasaka Shrine brings a bold visual presence, especially when the lighting makes sacred spaces look even more dramatic after dark. The challenge (and the opportunity) is capturing a shrine scene without washing out the bright elements or losing the subtle texture in shadow.
This is the moment where your composition practice matters. The guide will help you aim for structure—how buildings and pathways lead you toward key visual elements. For you, that means less random clicking and more “this is the picture I’m trying to make” thinking.
If you want a clear takeaway, it’s this: shrine photography at night rewards restraint. A strong frame often comes from choosing one main focus and letting everything else support it.
Hokan-ji Temple: Texture, Calm, and Learning to Photograph Shadows
Hokan-ji Temple can be a strong contrast stop: you’re moving from lively streets toward a more still-feeling scene. That shift is useful for learning, because shadows and darker corners are where most night photos struggle.
In a lesson like this, the photographer guide can help you adjust your approach to exposure and focusing so your frame still holds detail. Night doesn’t have to mean “everything becomes silhouettes.” You can bring out texture—stone surfaces, layered architecture, and the quiet mood that makes temple areas feel special.
This stop is also a good place to practice patience. If the scene looks perfect but your photo doesn’t, you can change timing, framing, or settings and try again. That “try again” rhythm is exactly what reviewers highlighted as generous and step-by-step.
Koju Ninenzaka: Slope Streets and Layered Angles
Koju Ninenzaka is all about slopes and layers—perfect for leading lines and depth. When you’re photographing a sloping street, the camera angle becomes your friend. Slight changes in height and tilt can change your entire photo’s sense of depth, which is a big deal in night scenes where everything competes for attention.
This stop fits the tour’s theme: capturing textures and patterns. The architecture along the slope and the way lights line up across surfaces gives your camera lots to work with. But it can also create chaos if your composition is too busy.
The pro guidance here helps you simplify. You’ll likely focus on one strong visual thread, then use the rest of the street as a supporting layer instead of trying to include everything.
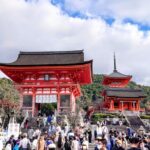
Kiyomizudera Temple: The Big Night Finale
Kiyomizudera is the stop most people recognize. But the lesson part is what makes it valuable: you’re shooting it with night photography in mind, with attention to how light and darkness shape the scene.
This is where long exposure practice starts paying off. If you’ve been working with a tripod (either your own or one provided upon request), this is the ideal moment to create an image that feels steady and intentional while still showing the atmosphere.
Kiyomizudera at night isn’t just a “look at the lights” photo. It’s a chance to turn a famous view into a personal photo with your own composition choices. The guide helps you aim for angles and lighting that make the scene feel story-driven rather than merely photographed.
How the 3 Hours Feels (and Why It Works)
Three hours sounds short until you realize night photography eats time. You need to reposition. You need to test settings. You need to wait for people to move through your frame. You need to reset for the next composition. That’s why a private lesson works so well here.
Also, the tour is designed to maximize your photographic opportunities. You’re not wandering aimlessly. Each stop connects to the lesson: street textures in Gion, lantern mood in Pontocho, cultural frames near performance spaces, shrine and temple atmosphere, then the big finale at Kiyomizudera.
If you’re the type who worries you’ll fall behind, don’t. You’re given the structure of a route, but the pace stays flexible for your skill level.
Price and Value: Is $170 Worth It?
$170 per person for about three hours is not a throwaway cost, so you’ll want to know what you’re really paying for.
Here’s the value equation I see:
- You’re getting a professional photographer guide plus a local English-speaking guide.
- You’re getting personalized instruction focused on your photos, not just general tips.
- Night photography instruction and long exposure technique are baked into the experience and supported at key stops.
- You’re not stuck with a large group pace—you can slow down, reshoot, and adjust.
If you already know how to expose for night and compose calmly, you might get less incremental learning. But even then, location-specific guidance in Kyoto is hard to replicate on your own. If you’re learning, or if you want your photos to look better fast, the lesson format is where the price starts to make sense.
One more practical point: your camera isn’t included. So if you don’t have gear, you’ll need to factor that into your decision. Also, a tripod is available upon request, and night photos get easier when you plan for stability.
Who This Masterclass Suits Best
This is a great match if you:
- want to improve your night photography quickly with real coaching
- like street scenes and temple atmosphere, not only big-ticket landmarks
- enjoy learning by trying, reviewing, and trying again
- value a route that includes Kyoto texture and lighting, not just popular sites
It may be less ideal if you want a purely sightseeing experience. This tour is about photography first. You’ll still see Kyoto, but you’ll experience it through the lens of composition and camera choices.
Practical Notes to Help You Get Better Results
- Plan for night shooting realities. Bring what you have for stability; if you need one, request a tripod since it’s available on request.
- Expect guidance on camera settings and composition during the walk, not just a lecture.
- Wear comfortable shoes. You’ll be moving through historic streets and temple areas, and tempo matters even in a private tour.
Should You Book It?
If you want Kyoto photos that look controlled—sharp, thoughtfully framed, and actually suited to night light—this is an easy yes. The best reviews highlight the process: the guide support, patience, tripod assistance on request, and reviewing your shots to keep improving. That’s exactly what you need when night photography is your goal.
If your plan is more about casually taking pictures than learning camera technique, you might not squeeze full value from the coaching. But if you’re serious about leveling up your night shots, this private masterclass gives you structure, expert feedback, and the right Kyoto locations to practice.
FAQ
What is included in the Kyoto Photography Masterclass?
You get a local guide, a professional photographer guide, and a licensed English-speaking in-person local guide.
How long is the private photography lesson?
It’s about 3 hours.
What does the tour focus on?
It focuses on street photography and night photography, including challenges like long exposure, with instruction on camera settings and composition.
Is a camera provided?
No. A camera isn’t included.
Is a tripod available?
A tripod is available upon request.
Where does the tour start and end?
It starts at the Statue of Izumo-no-Okuni Kawabatacho in Higashiyama Ward, Kyoto, and ends back at the meeting point.
Is this a private tour?
Yes. It’s private, so only your group participates.
Is there a cancellation option?
Yes. Free cancellation is available up to 24 hours in advance for a full refund.
Is it easy to reach the meeting point by public transport?
Yes. The meeting point is near public transportation.