REVIEW · KYOTO
Kyoto: Private Photoshoot Experience in Arashiyama Bamboo
Book on GetYourGuide →Operated by PhoenixJP合同会社 · Bookable on GetYourGuide
You came to Kyoto for the photos, but also for the feeling. This private Arashiyama bamboo photoshoot turns a crowded area into a guided walk with smart posing help and iconic backdrops. I like how the photographer keeps the pace easy and gives real direction so you don’t stand there thinking what to do with your hands. I also like the photo deal: you get a bundle of images plus 30 edited, high-resolution keepers delivered within 24 hours.
The main consideration is timing. In busy seasons, photo editing can take a bit longer than 24 hours, and downloads are only available for a short window after delivery.
In This Review
- Key highlights worth your attention
- Arashiyama Bamboo: Why This Area Photographs So Well
- Meeting Point and How the Private Shoot Actually Feels
- Togetsukyo Bridge First: Classic Framing With Real Depth
- Bamboo Forest Walk: From Crowds to Clean Shots
- Kimono Forest Pillars and Nonomiya Shrine for Variety
- The Katsura River Riverside Path: Where You Catch Your Breath
- How Many Photos You Get (and What Editing Includes)
- Timing Reality: 90 Minutes to 7 Hours, and What That Changes
- Price Value: What $129 Buys in Arashiyama
- What to Wear, Ask For, and How to Get Natural Poses
- Accessibility and Private Group Comfort
- Who Should Book This Arashiyama Photoshoot
- Should You Book This Private Arashiyama Bamboo Photoshoot?
- FAQ
- Where is the meeting point?
- How long is the photoshoot?
- What locations are typically included?
- How many photos will I receive?
- When will the edited photos be delivered?
- Do I get raw files?
- Are admission fees included for temples or paid sites?
- What languages are available for the guide?
- What are the cancellation terms?
Key highlights worth your attention
- Togetsukyo Bridge start for instant Kyoto wow with a mountain-lined view
- Bamboo Forest route that prioritizes angles and pacing, even with crowds around
- Kimono Forest pillar photos for color and strong, Instagram-ready compositions
- Nonomiya Shrine stop for a quieter, more temple-like moment
- Katsura River riverside path to slow down between the big-photo areas
- A private guide who can adjust stops to your preferences and help with posing
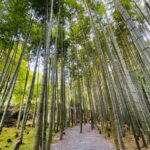
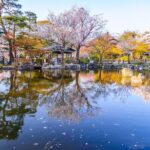
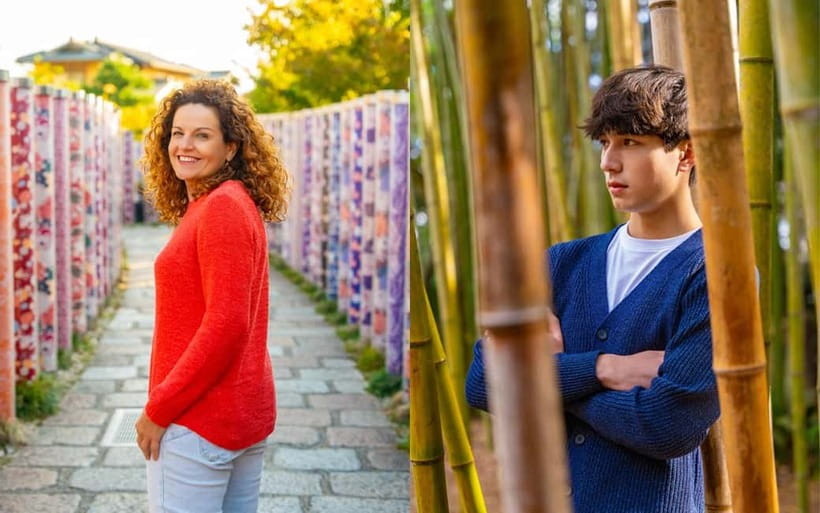
Arashiyama Bamboo: Why This Area Photographs So Well
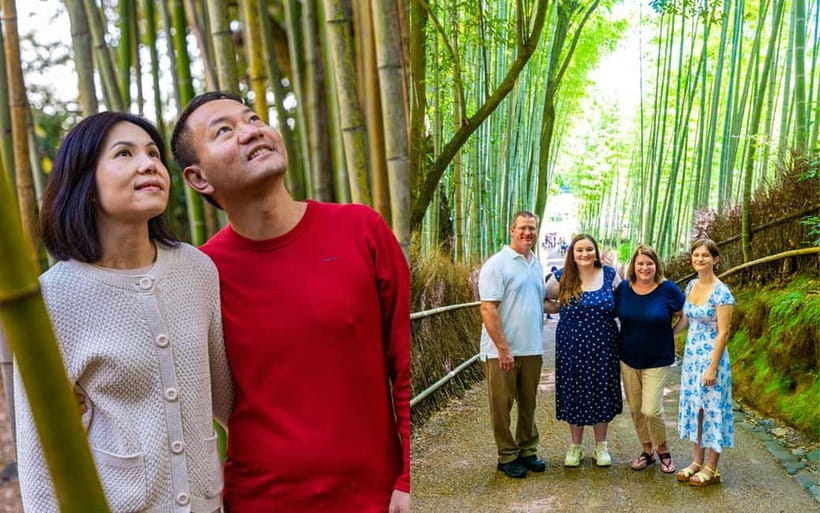
Arashiyama is one of those Kyoto districts where the scenery does half the work for you. The bamboo grove gives you clean vertical lines, the bridge frames the river like a postcard, and the temple-adjacent streets add texture when you want variety. You’re not just taking pictures in one spot. You’re walking through a cluster of set pieces that all feel connected.
What makes the private photoshoot format valuable here is control. In Arashiyama, there’s always motion: tour groups, background traffic, and people popping into your frame. A good photographer turns that into an advantage by timing shots, finding workable pockets, and guiding you so you don’t feel awkward trying to pose while everyone else crowds the same angle.
And yes, the bamboo is the headline. But the less-famous stops are where your gallery starts to feel like a story instead of a single location. If you want your photos to look like you really walked around Arashiyama, this route is built for that.
You can also read our reviews of more private tours in Kyoto
Meeting Point and How the Private Shoot Actually Feels
You meet your guide in front of Arashiyama Station (Randen line). That’s handy because you can arrive on public transport without needing a taxi plan. The activity also lists a starting address at 63-1 Sagatenryūji Susukinobabachō, so if you’re arriving a few minutes early, it’s worth keeping your phone handy in case you need quick wayfinding to the first photo spot.
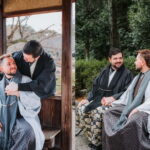
Because it’s private, the experience isn’t about “keep up” energy. You’ll walk at a pace that supports the photos: stop, shoot, reposition, shoot again. In the feedback from past clients, multiple people praised the photographer for being patient and for checking in on what they want. That matters in bamboo-heavy areas where your best shots often come after a minute or two of repositioning.
You also get language support: Arabic, English, and Japanese are listed. That’s useful not just for communication, but for getting clear posing cues fast.
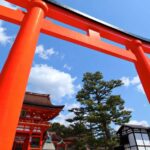
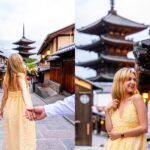
Togetsukyo Bridge First: Classic Framing With Real Depth
The shoot typically starts at Togetsukyo-kyo Bridge. This is the Kyoto “you can’t miss it” landmark: a riverside crossing with mountains in the background that instantly gives depth. Starting here is smart because you build your visual theme early. From there, the walk naturally leads you into bamboo and shrine-area scenery.
The bridge stop is also where the photographer earns their fee. It’s famous, so it’s busy. A private guide helps you avoid the most awkward framing problems, like having half the crowd block your view or creating weird gaps between you and the background.
If you’re doing this as a couple, this is also where you’ll get flattering positioning advice. A recurring point in the feedback: clients felt comfortable because the photographer guided them through poses instead of assuming you already know how to stand in a way that looks natural on camera.
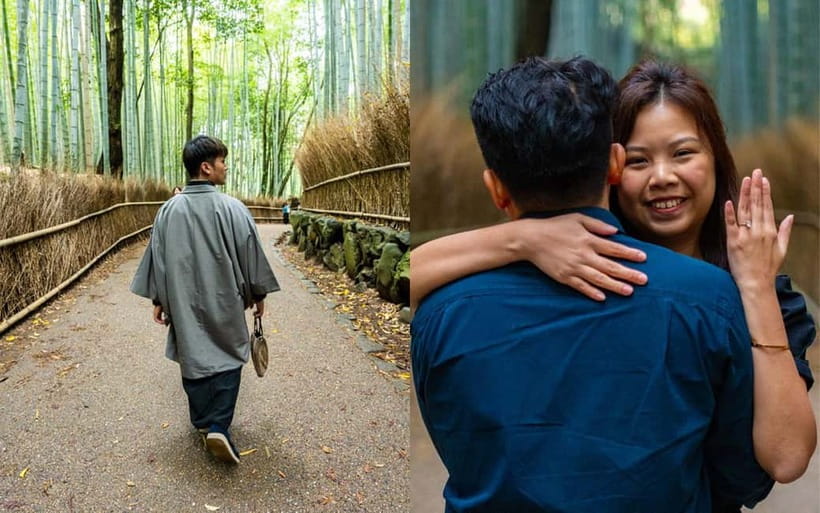
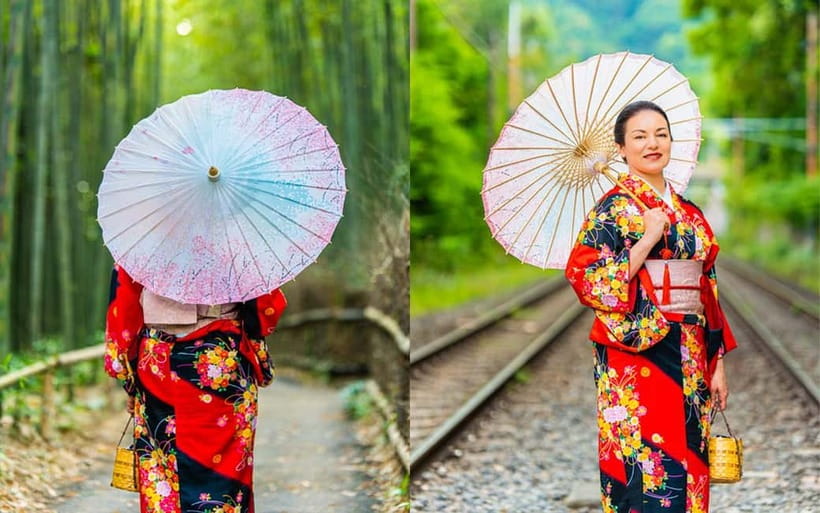
Bamboo Forest Walk: From Crowds to Clean Shots
The bamboo grove is the moment people travel for. The green canopy creates a strong sense of place, and the path gives you an easy “leading line” effect that feels cinematic. But bamboo areas are also crowded, and it can be hard to get a shot that looks like it’s just you and the scenery.
Here’s the advantage of doing this with a pro: the photographer doesn’t treat the grove as one photo and done. They keep shooting, adjusting your angle and your position. Past clients specifically praised finding good spots even when it was packed, which is exactly what you want when the whole world is chasing the same shot.
One small detail that came up: at least one client mentioned the photographer helped during light rain by letting them use his umbrella. That kind of practical support is underrated. Kyoto weather can change fast, and having someone ready for it keeps the photoshoot moving instead of turning into a stop-and-wait situation.
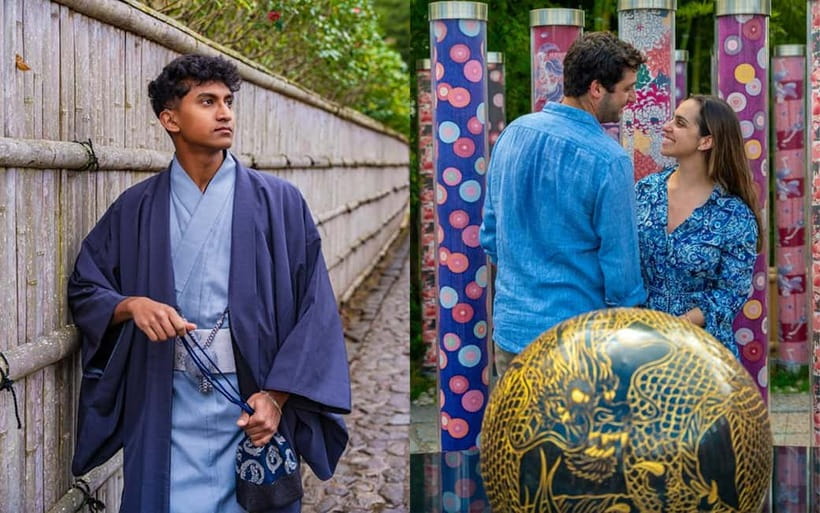
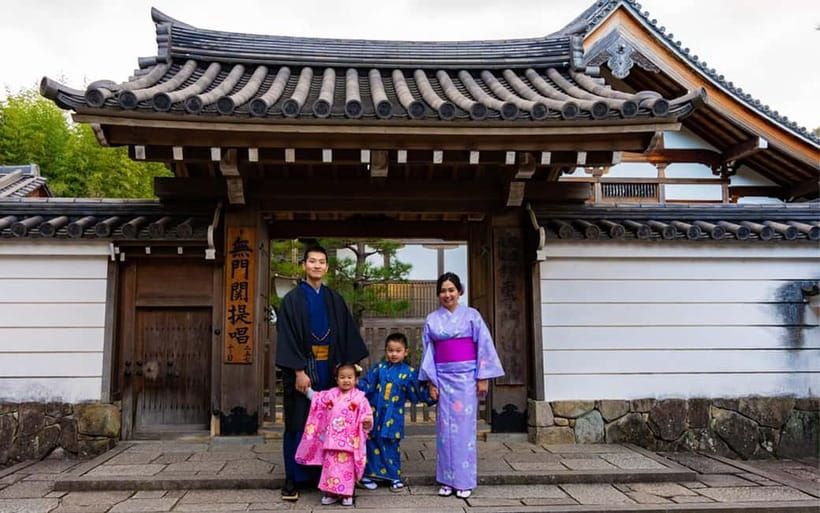
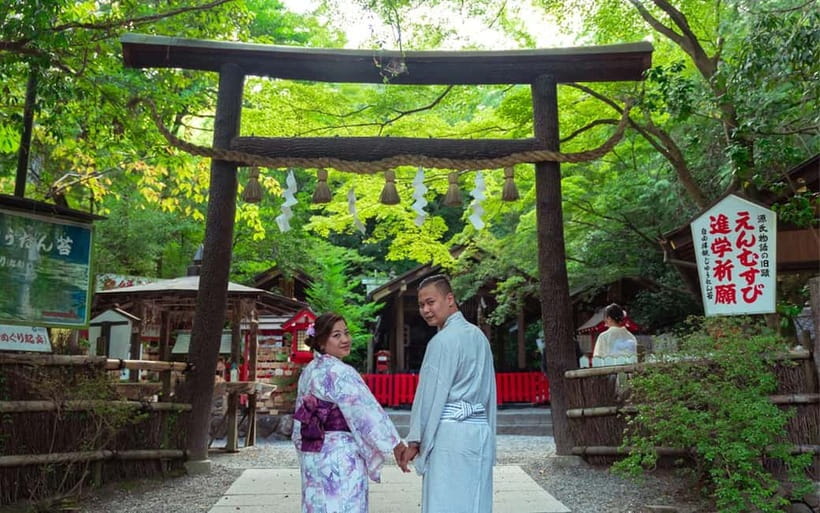
Kimono Forest Pillars and Nonomiya Shrine for Variety
After the bamboo, the route usually shifts into texture and color. Kimono Forest is described as a collection of illuminated kimono-patterned pillars. That’s a different look than the bamboo’s vertical green. You get stronger contrast, bolder patterns, and lighting that can make your outfit choices pop. If you’re worried your photos might all look the same, this stop is the fix.
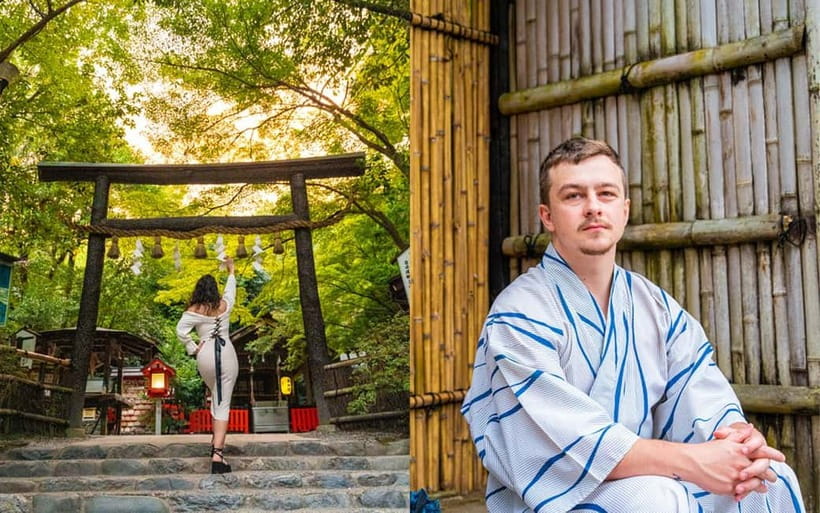
Next, you’ll typically include Nonomiya Shrine. Shrine-area scenery brings a more grounded Kyoto atmosphere. In practical terms, it gives you a break from the bamboo’s repeating shapes. Your gallery ends up with photos that feel balanced: iconic landmark shots, bamboo immersion vibes, then a quieter temple-feel moment.
The best part of having a private guide at this stage is flexibility. The experience is set up for “recommended locations,” but it’s also described as adjustable to your preferences. If you want more shrine calm or more river walking, you can ask.
You can also read our reviews of more photography tours in Kyoto
The Katsura River Riverside Path: Where You Catch Your Breath
Between the biggest photo scenes, you’ll often walk the riverside path along the Katsura River. This is one of those “wait, this is why I like Kyoto” sections. The river setting gives you wide views, softer background detail, and a calmer rhythm than the bamboo corridor.
It’s also where couples and solo travelers often end up enjoying the experience most. You can relax a bit while still getting guided shots. People mentioned having fun walking around, and that fits this portion well: it’s scenic, not just photogenic.
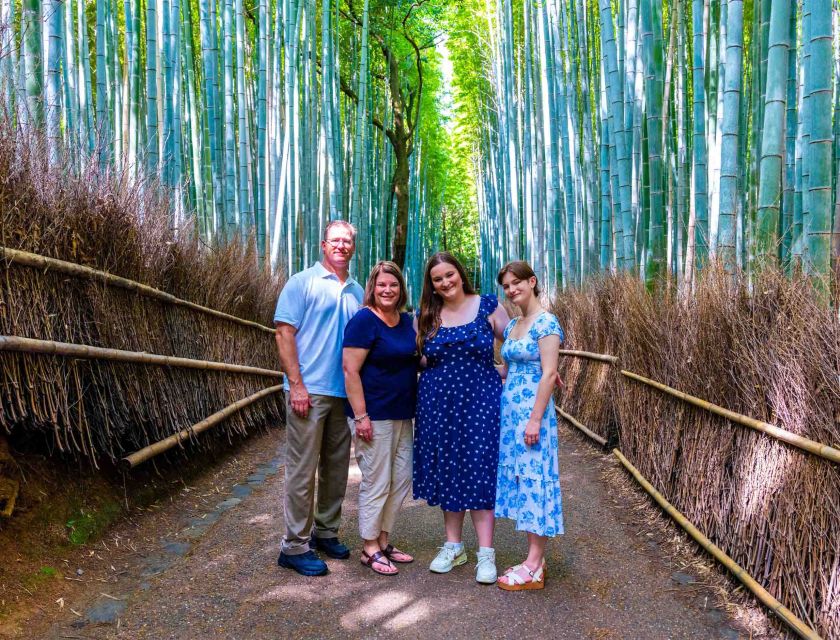
If you’re traveling with family, this is also helpful because it’s easier to move through at a comfortable pace. Shrine and bamboo stops can involve more stopping and repositioning, while the riverside gives you room to breathe.
How Many Photos You Get (and What Editing Includes)
This is where you should pay close attention before booking. The deal is clear:
- You receive about 200 photos per hour in standard-quality JPG format (as part of the shoot images).
- You receive 30 professionally edited, high-quality JPG photos delivered typically within 24 hours.
- You also get all unedited photos for personal use.
So even if you’re picky, you’ll have options. A smart strategy is to look through the unedited set quickly after delivery and then pick your edits with confidence. Past clients repeatedly praised the photographers for showing photos along the way, which helps you know you’re getting what you want without guessing.
If you’re a photo nerd and want full flexibility, raw files are available for an extra ¥10,000 per booking. That’s not included by default, so it’s good to decide what you actually need: edited keepsakes or raw editing freedom.
One more practical note: photos are downloadable for 2 weeks after the link is sent. Save them promptly once the link arrives. This is one of those small rules that can matter later.
Timing Reality: 90 Minutes to 7 Hours, and What That Changes
The experience duration is listed as 90 minutes to 7 hours. At the same time, you’ll typically hit 5–6 recommended locations within about 1.5 hours, with the option to adjust based on your preferences.
So think of it like this: the shoot is flexible, but the “core route” is built around a quick set of major scenes. If you book for the shorter window, you’ll likely focus on the top stops with fewer detours. If you stretch it longer, you’ll have more time for extra angles, slower walks, and additional hidden spots around Arashiyama.
This matters if you’re traveling during peak times or if you want more than just landmark photos. Those extra minutes can turn a “good set of pictures” into a “photos that feel like my Kyoto day.”
Price Value: What $129 Buys in Arashiyama
The price is listed as $129 per group up to 1. That pricing structure can be excellent value if you’re traveling solo and want a true private session rather than squeezing into shared group coverage. You’re paying for direction, location knowledge, and the editing workflow.
Is it worth it for couples? It can be, especially if you’ve ever tried to get consistent couple shots in a busy place with uneven lighting. A guide who can set up scenes, help with pose comfort, and find better spots can be more valuable than buying a better camera app.
In short: if you care about looking good in photos and want your Kyoto time to feel guided instead of stressful, this is a solid spend. If you’re happy with phone selfies and don’t care about editing or posing cues, you might not need a pro.
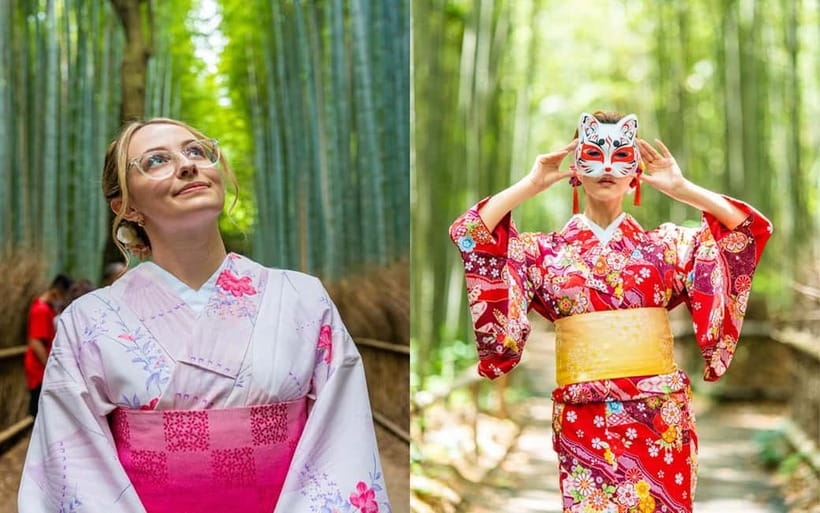
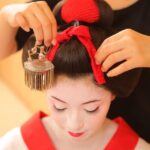
What to Wear, Ask For, and How to Get Natural Poses
You’ll get the most from this shoot if you treat it like a collaboration. Based on client feedback, the photographers guide you through poses and expressions. People specifically said they’re not naturally “posey,” and the guide made them comfortable by directing them step-by-step.
A few practical moves that work well:
- Bring an outfit you feel great in for both bamboo and shrine/riverside stops. Bamboo photos can be very flattering with simple silhouettes.
- Tell your guide what you want the photos to feel like: romantic, classic Kyoto, casual street-walk, or a mix.
- If you have a special request, say it early. The experience is described as customizable for specific locations.
- If weather looks iffy, be ready for it. At least one client noted the photographer helped with an umbrella when it rained.
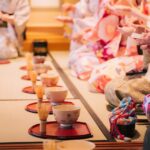
If you want a bonus: one review mentioned the photographer shared cultural tips and suggestions for food and language between shot locations. That’s not guaranteed, but it shows this experience can feel more like a guided Kyoto moment than just clicking photos and leaving.
Accessibility and Private Group Comfort
The experience lists wheelchair accessibility and private group time. The route includes walking and photo stops, so the exact comfort level depends on your needs and your guide’s pacing, but the intent is to keep it usable.
Private also helps with comfort. You’re not worrying about where everyone else is standing or timing your shot around someone else’s turn. That’s a big deal in places where the crowd moves fast.
Who Should Book This Arashiyama Photoshoot
Book it if:
- You want iconic Arashiyama photos without spending your vacation managing tripod battles.
- You want posing help and a photographer who can keep you comfortable.
- You’d rather receive edited photos quickly than rely on luck.
Consider skipping if:
- You only want a few casual snapshots.
- You’re not interested in editing or in getting a structured set of locations.
It especially suits solo travelers who want a full gallery that includes you in the frame, and couples who want flattering couple shots without feeling awkward.
Should You Book This Private Arashiyama Bamboo Photoshoot?
I’d recommend booking if your priority is a polished photo set from Arashiyama with minimal stress. The biggest wins are the guided pacing, the way the stops create variety, and the photo package: 30 edited photos plus all unedited JPGs delivered within a day or so.
Just book with the reality in mind: the area can be busy, and editing can slip in peak seasons. If you’re okay with that and you want photos that actually look like Kyoto, this private session is a strong choice.
FAQ
Where is the meeting point?
Meet your guide in front of Arashiyama station (Randen line).
How long is the photoshoot?
The duration can be from 90 minutes up to 7 hours, depending on availability and starting time.
What locations are typically included?
Common stops include Togetsukyo Bridge, the Bamboo Forest, Kimono Forest, a riverside path along the Katsura River, Nonomiya Shrine, and additional hidden spots in the area.
How many photos will I receive?
You’ll get all photos from the shoot (around 200 photos per hour) in standard-quality JPG format, plus 30 professionally edited high-quality JPG photos.
When will the edited photos be delivered?
Edited photos are typically delivered within 24 hours, though delays may happen during busy seasons.
Do I get raw files?
Raw files are not included. They are available for an extra ¥10,000 per booking.
Are admission fees included for temples or paid sites?
Admission fees are not included. For paid-entry sites, the client is responsible for the photographer’s admission fee.
What languages are available for the guide?
The guide is available in Arabic, English, and Japanese.
What are the cancellation terms?
Free cancellation is available up to 24 hours in advance for a full refund. Reserve now & pay later is also offered.